How to Set Up and Use the Jira Slack Integration (+ FAQs)


Start using Visor today
- Visualize all your projects and data

- Roll up multiple projects into portfolio views
- Try Visor for FREE
If you’re working remotely, you’re probably already familiar with Slack’s many integrations, including Jira. Slack offers a variety of integrations, but one of its most powerful is its integration with Jira Cloud, the most popular software for managing and tracking agile projects. A Jira Slack integration allows you to accomplish various tasks, including sending Jira notifications, previewing Jira issues, and transitioning, assigning, and commenting on issues directly from Slack.
With remote work still increasing in popularity among employees, these integrations are becoming more important than ever, so understanding how to make the most of them is vital.
In this post, we’ll cover:
- How to make a Jira ticket in Slack
- How to create a Jira / Slack integration
- The perks & limitations of a Jira / Slack integration
In addition, we’ll show you another easy and collaborative way to make Jira tickets by using Visor’s Jira spreadsheet and bi-directional Jira integration.
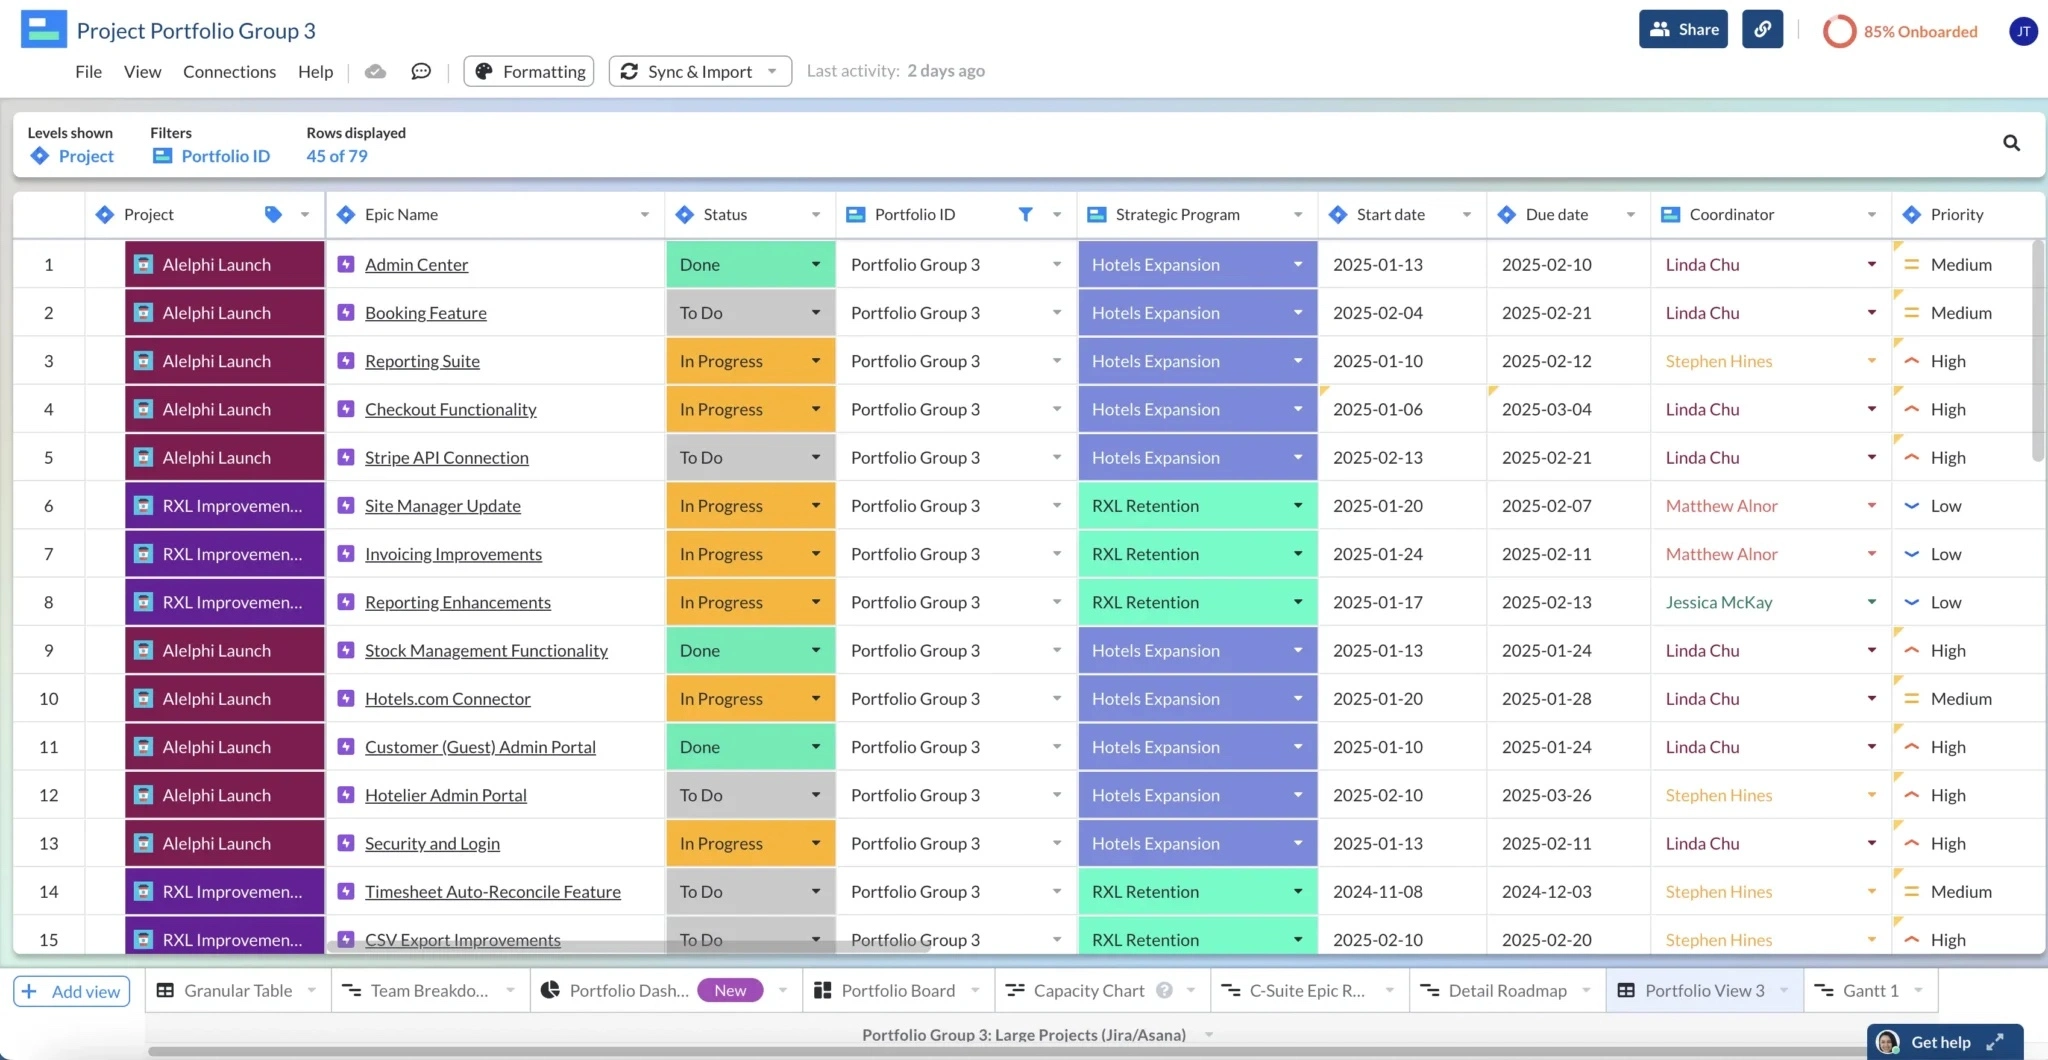
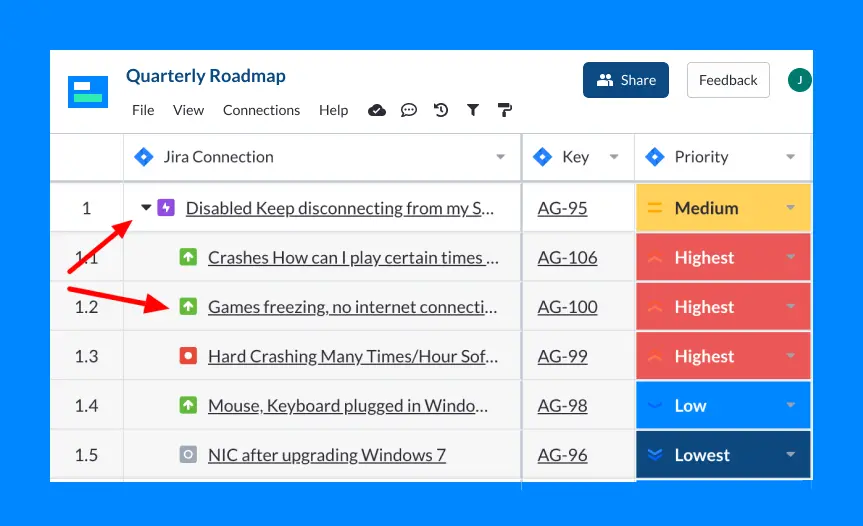
A Jira-integrated spreadsheet in Visor
Visor is a project portfolio management tool that can help you make the most of your Jira instance with bi-directional integrations and modern, beautiful reporting options. Give it a try for free!
Can I connect Jira to Slack?
Yes, you can create a two-way connection between Jira and Slack using the Jira Cloud for Slack app or even using tools like Zapier.
The Jira Cloud for Slack integration lets you create tickets from Slack or receive Jira notifications as messages in Slack, among other easy-to-use automations.
You can find the Jira Cloud for Slack app in both the Slack App Directory and the Atlassian Marketplace.
Why connect Slack with Jira?
Users are keyed into Slack throughout the day, making it a good spot to both draw attention to potential Jira tickets and get up-to-the-minute updates on existing issues.
In other words, there are a number of benefits to setting up a Jira Slack integration, including:
- Create issues in Slack
- Get personal Jira notifications in Slack direct messages rather than via email
- See updates for specific projects in your preferred channel
- Access issue previews when a Jira issue is sent via Slack
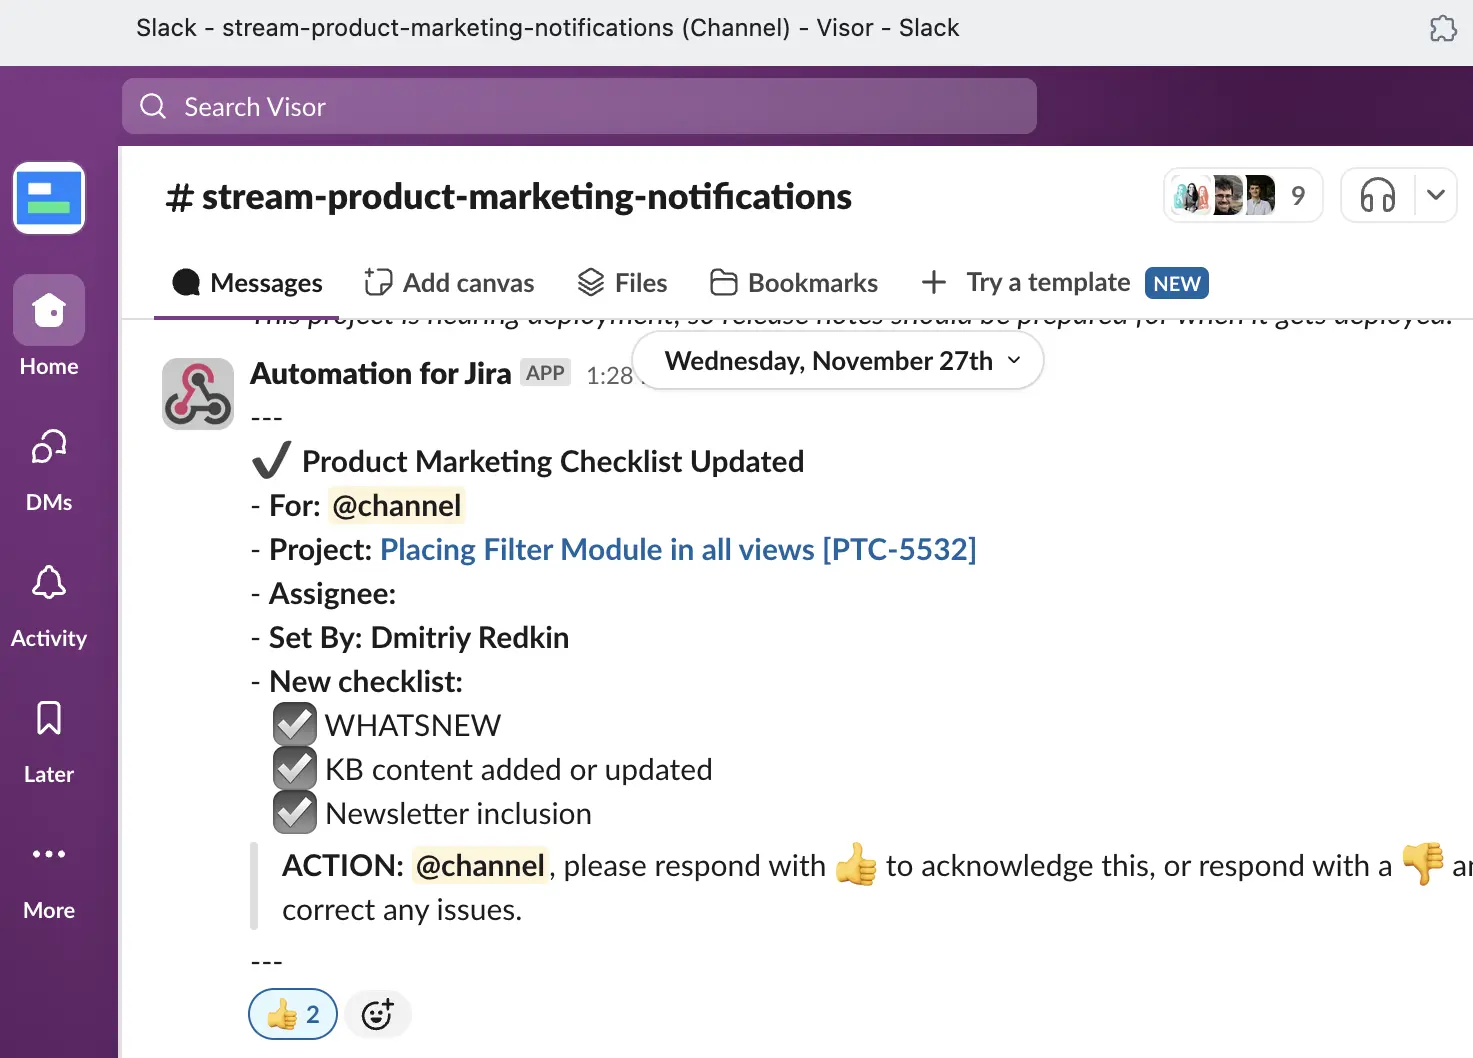
Slack can also work really well for making people aware of projects that are progressing. As a marketer who uses Jira, I use an automation to help make it clear when there are new features for product marketing to start building collateral around. Because I’m always in Slack, this ping helps me stay on top of what the engineering and product teams are shipping.
Jira + Slack Automation for Visor’s Product Marketers:
How does Jira integrate with Slack?
There are a couple of ways to integrate Jira with Slack.
- Jira and Slack have a joint integration that allows you to connect the two applications. You can find integration in the Slack App Directory and the Atlassian Marketplace. This integration opens a two-way connection between Slack and Jira, letting you create issues in Slack or get Slack notifications about Jira updates.
- You can also use Zapier (or Zapier alternatives) to connect Jira with Slack. This is what we do at Visor (see screenshot above) to help keep our teams connected. In fact, our CEO gave an entire talk to an Atlassian Community Group about the topic of automations in Jira.
The first option is better for actually creating Jira tickets in Slack, whereas Zapier is better for letting you know about Jira updates in Slack.
Can Jira send a Slack message?
Yes, Jira can send messages to Slack.
There are a few easy ways to set up notifications from Jira. Most of these are handled by Jira Bot – a bot that allows you to quickly create connections between Slack channels and Jira projects. To use Jira Bot and perform any of the following actions, you’ll need to download the Jira Cloud for Slack app and connect Slack and Jira (more on that below).
Most actions performed by the Slack Jira integration are automatic – for instance, it will send a preview of any Jira issues mentioned in Slack channels the Jira Bot has been invited to. Others require simple slash commands, like the ones we mention below.
Get notifications on a Jira Project
When you have the Jira Cloud for Slack app you can do a few things to get notifications from Jira while you’re in Slack:
- Invite Jira Bot to your Slack channel. The bot can then let you connect the channel and a given project.
- Use /jira connect. This command lets you set up a quick connection between Jira and Slack.
Send personal Jira notifications via a Slack Jira connection
Say you want to receive personal notifications when certain actions happen in Jira.
You can set up personal notifications in a few short steps:
- Send a DM to @Jira or mention @Jira in a public or private channel
- Type /jira notify
- Select “Turn on Personal Notifications”
- Decide which actions will trigger a Slack message.
Slack Alternatives for Improving Jira Workflows
Some other software and applications allow you to create Jira issues directly from other workflows as well. One of this applications is Visor.
Similar to how Slack feels familiar and is used daily or weekly by most people across various teams in a company, spreadsheets are also an easy workspace to integrate Jira with. And while Jira has a one-way sync with Google Sheets and allows you to export Jira data to Excel, Visor’s two-way Jira syncing is designed for accuracy and efficiency.
A Jira-integrated spreadsheet in Visor
Visor integrates seamlessly with your Jira Cloud instance, displaying all your issues in views that resemble the spreadsheets and roadmaps you’re used to. To create a Jira ticket from Visor, simply create a new row and start typing! The instructions show you how to get started.
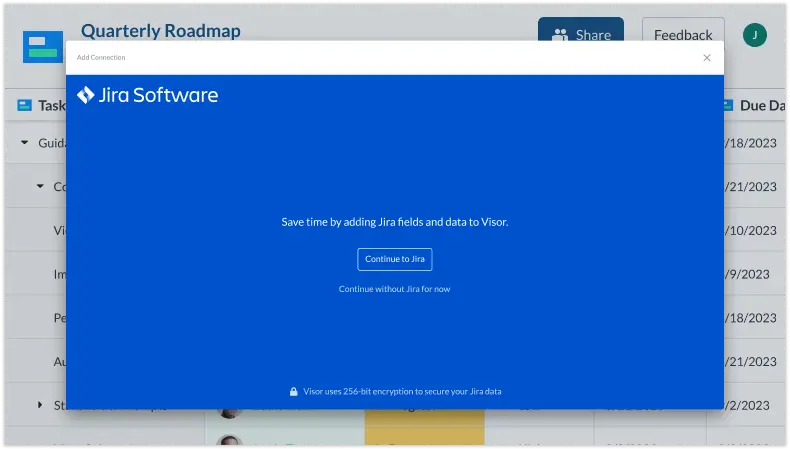
Step 1: Connect Jira to Visor.
You can connect Jira and Visor with just a few short clicks. Upon starting Visor, select Jira as your first integration.
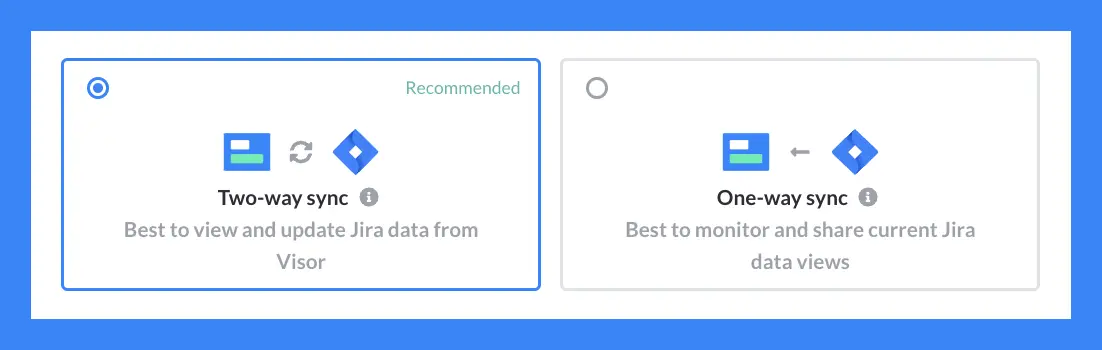
Step 2: Choose Visor’s Two-Way Jira Syncing.
Because you want to import Jira data and push new issues back to Jira, you’ll want to select Visor’s two-way syncing option. If you wanted to only visualize your Jira data in Visor, then you’d choose one-way.
Jira and Visor two-way sync
Step 3: Choose to Maintain or Ignore Jira Nesting when importing.
You can decide for your Jira issues to import with parent/child relationships or import a flat data hierarchy. You’ll want to maintain nesting for when you push issues back to Jira.
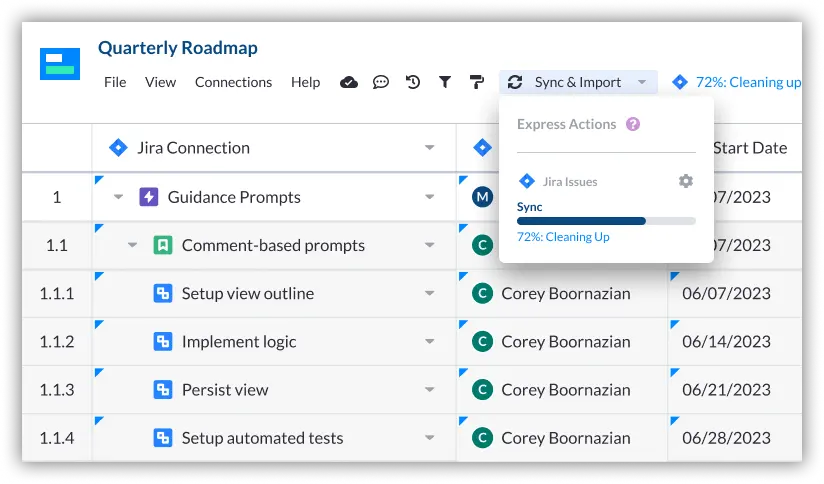
Visor accepts over 75 Jira fields. Decide which fields you want in your Visor spreadsheet.
Step 4: Create new Jira tickets by making a row & syncing.
Once you have your Jira data imported, make new Jira issues (e.g., epics, issues, subtasks) by creating a new row or a new nested row. When you’re done, hit sync to send it back to Jira.
Connecting Jira to Visor is a surefire way to maximize your Jira usage, making connections to Slack more effective than ever.
Now that we have a handle on Jira, let’s talk about that Jira Slack integration.
How do I automate my Jira Slack connection?
There are two ways you can automate tasks from Jira to Slack, by using Jira Cloud.
One of these methods is easier than the other, but we’ll explore both.
Automate Jira to Slack using the Jira Cloud for Slack integration
There are many other shortcuts and quick actions you can execute using a Jira Slack integration. Atlassian’s support site lists a few, but here are the top three most common aside from creating a Jira ticket:
- Notify – typing /jira notify allows Slack to send you your Jira notifications directly. If you’ve already set up notifications, notify will also allow you to adjust your preferences.
- Connect – the connect action allows you to connect a Slack channel to a Jira project and receive updates and notifications from that project. Simply type /jira connect and select which project you want to receive notifications from.
- Manage – typing /jira manage allows you to manage the Jira project connections for that specific channel.
Automate Jira to Slack using the Jira Cloud for Slack integration
You can also set up automations from the Atlassian Playground. Atlassian offers a basic explanation of the process in the video below, along with step-by-step written instructions.
How do I create a ticket from Slack to Jira?
Creating a Jira ticket in Slack is a convenient way to quickly and easily transfer a task or information from a personal or channel Slack conversation to your Jira instance in just a few steps.
And while Visor’s Jira integration allows you to create tickets in an easy-to-use spreadsheet, our planned Slack integration is not out in the wild just yet. Therefore, we recommend that you make Jira tickets in Slack through the following steps:
Once you’ve integrated Slack into your Jira instance, follow the steps below. (If you haven’t integrated Jira with Slack just yet, check out the next section in this post to find out how.)
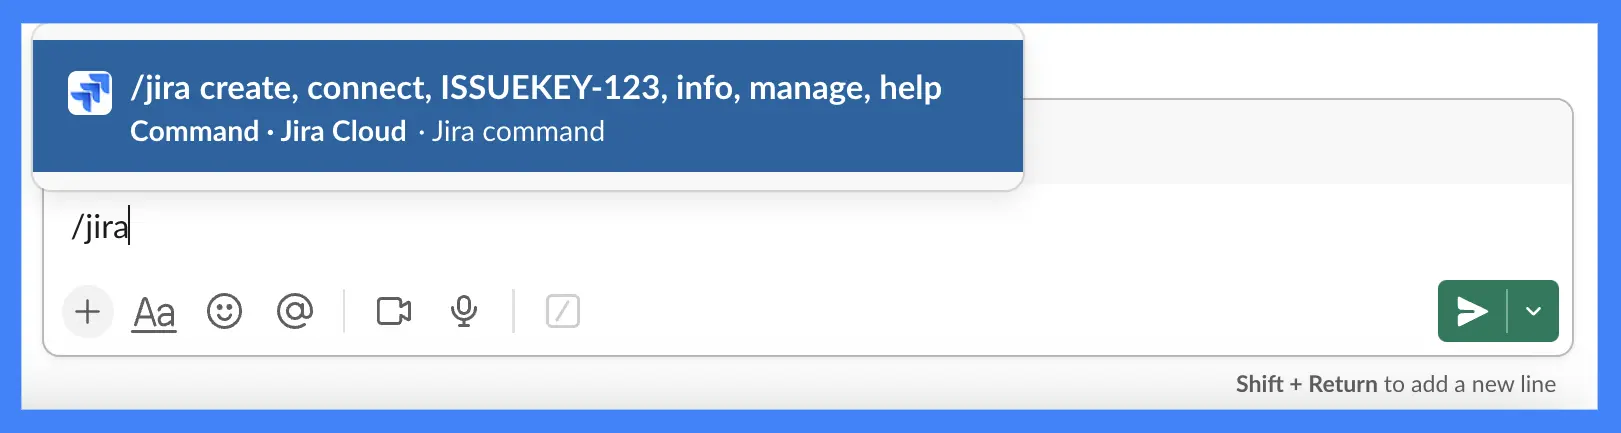
Step 1: Access the Jira “create” command in your Slack workspace
Type /jira create into any Direct message or Channel in your Slack workspace and then send the message by either pressing the Enter / Return key or the green airplane button in the bottom right corner.
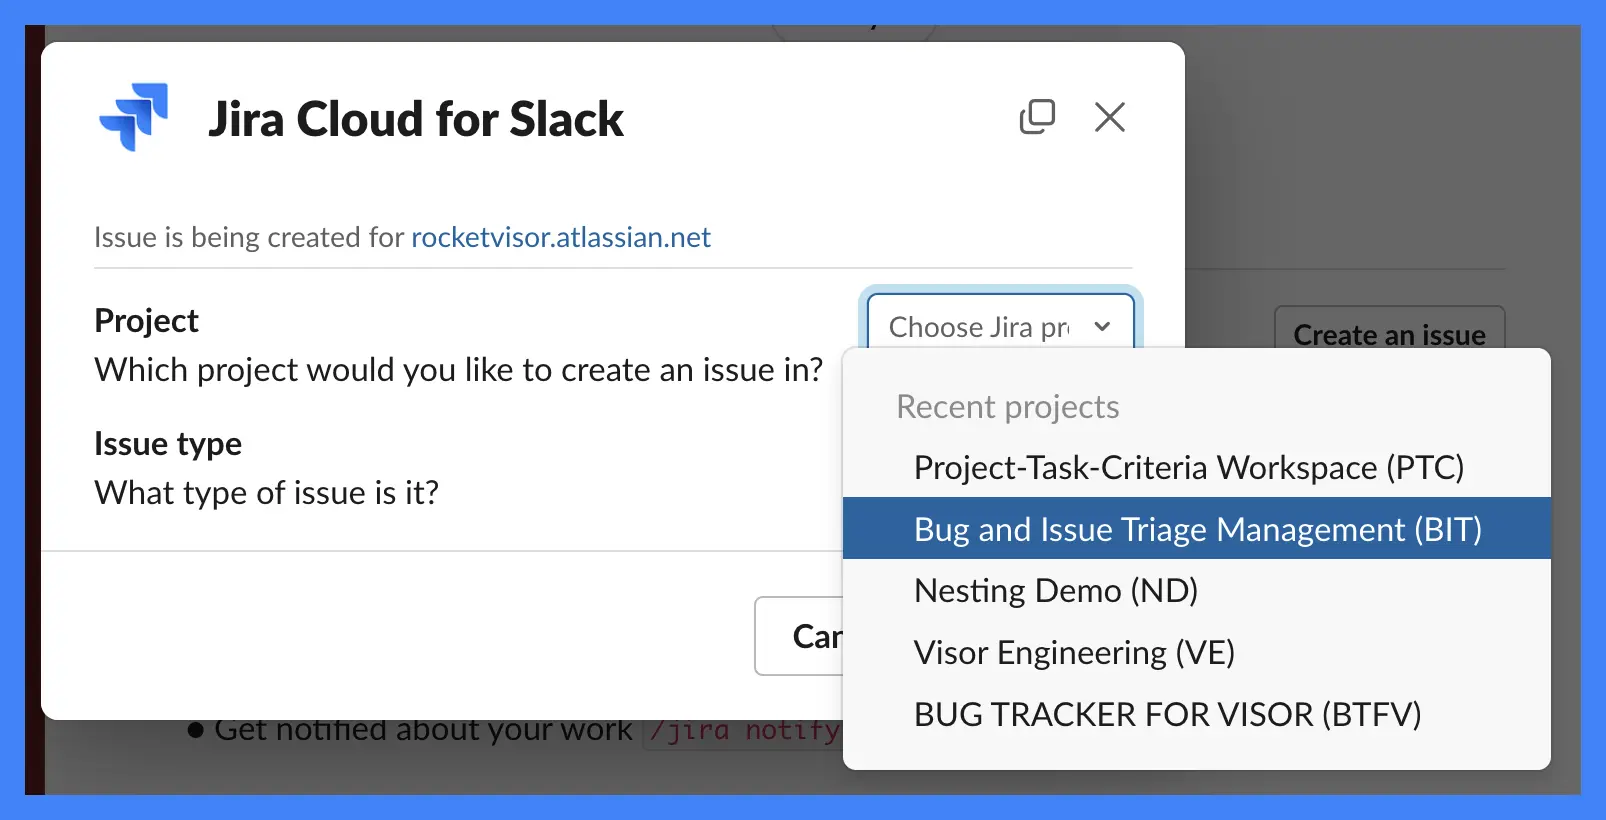
Step 2: Select your Project and Issue Type
After executing the Create command, you’ll be prompted to select which Project you would like to create your Jira ticket in and which Issue Type you would like it to be. Common issue types include Epic, Story, Task, Subtask, and Bug.
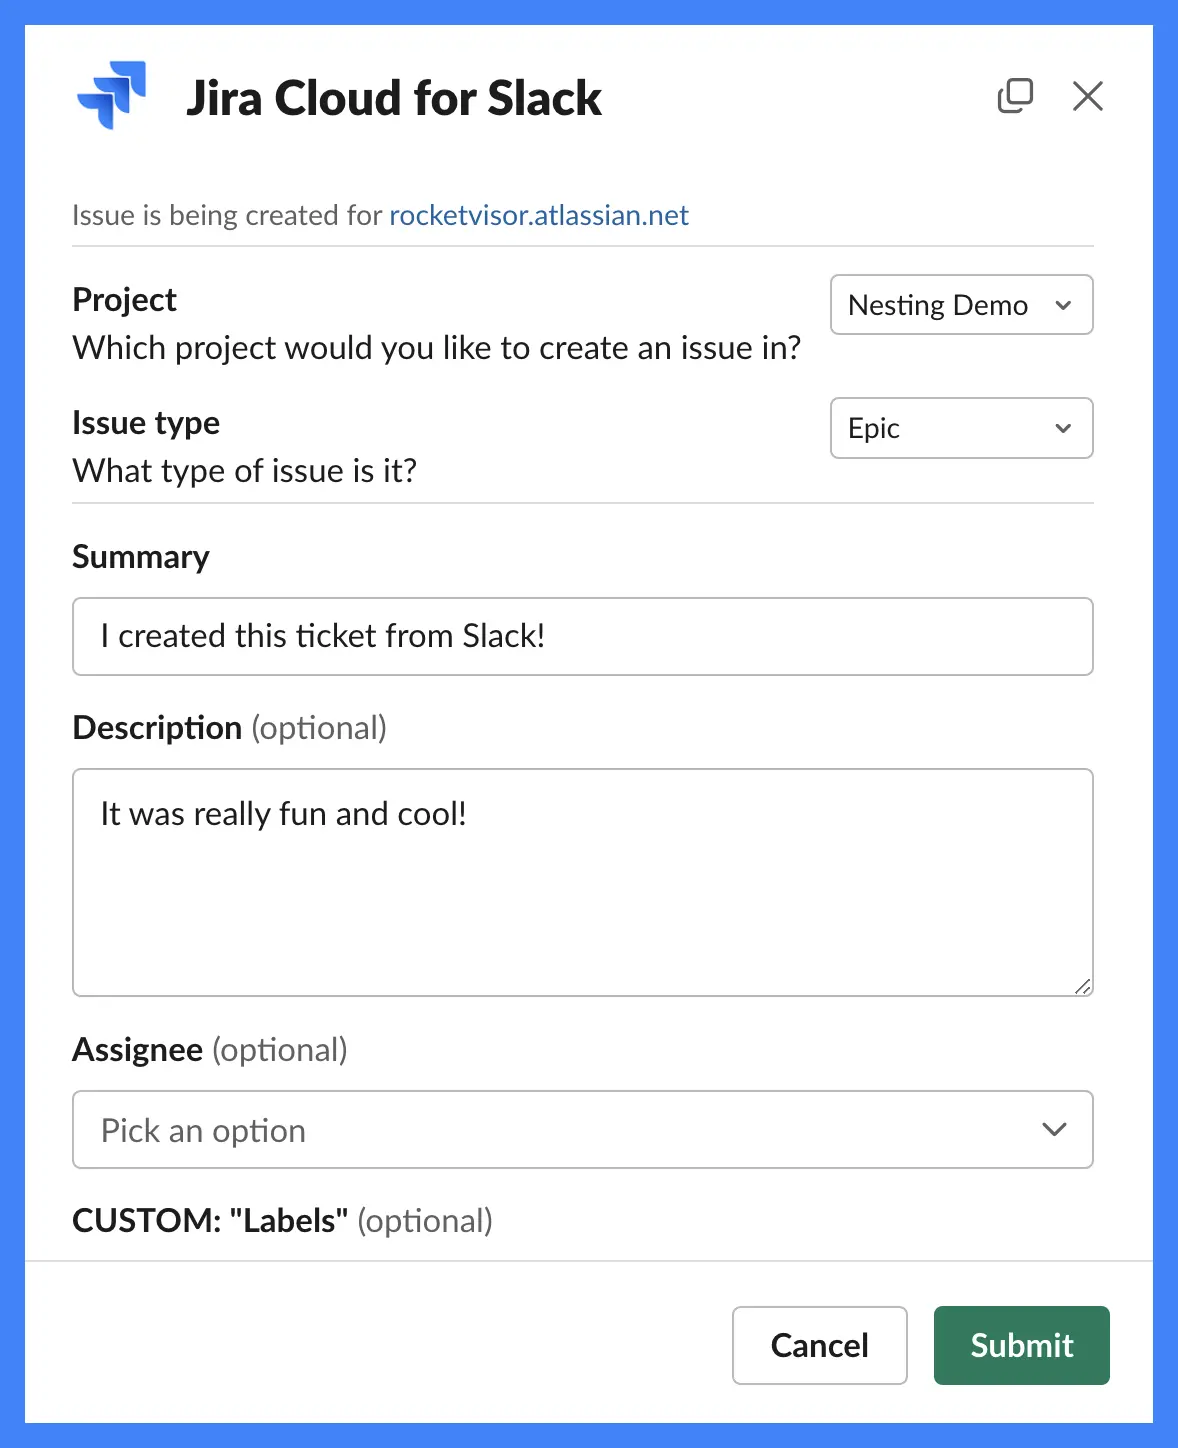
Step 3: Enter your Jira Ticket Information
Once you’ve selected which project you would like to create your Jira ticket in and what type of ticket you would like to create, you will be prompted to to fill out the Summary, Description, Assignee, and any other fields your Jira project might contain. Only the Summary is required.
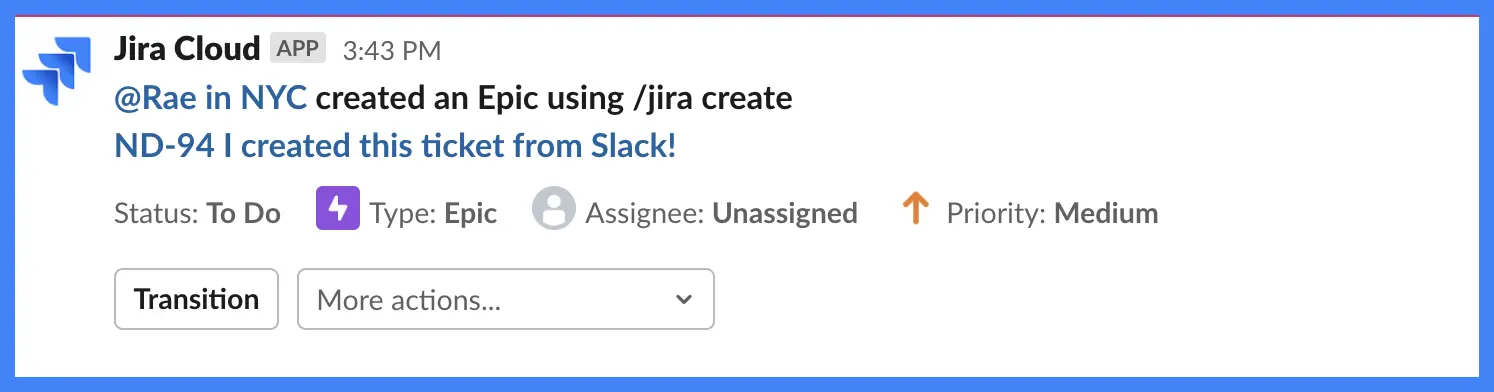
Step 4: Submit your Jira Ticket from Slack
Once you click Submit, your ticket will be created in Jira! You’ll receive a confirmation message in Slack that contains a hyperlink to your newly created Jira ticket in your Jira instance. You’ll also be able to complete more actions directly from Slack like assigning, opting to watch, or commenting on the ticket.
Limitations to a Jira Slack Integration
The Jira Slack integration is incredibly powerful. However, it does come with a couple of limitations.
- Only Jira Admins can enable applications like Slack to connect with Jira. If your Admin has disallowed this kind of connection, you will not be able to connect Jira and Slack.
- If Slack is prompted to connect to a Jira project with issue-level security, you will not receive notifications for those issue types.
- There are multiple Jira products that integrate with Slack, so be sure to make sure you are selecting the right one when setting up your integration or you will likely run into issues.
How to Set Up a Jira Slack Integration
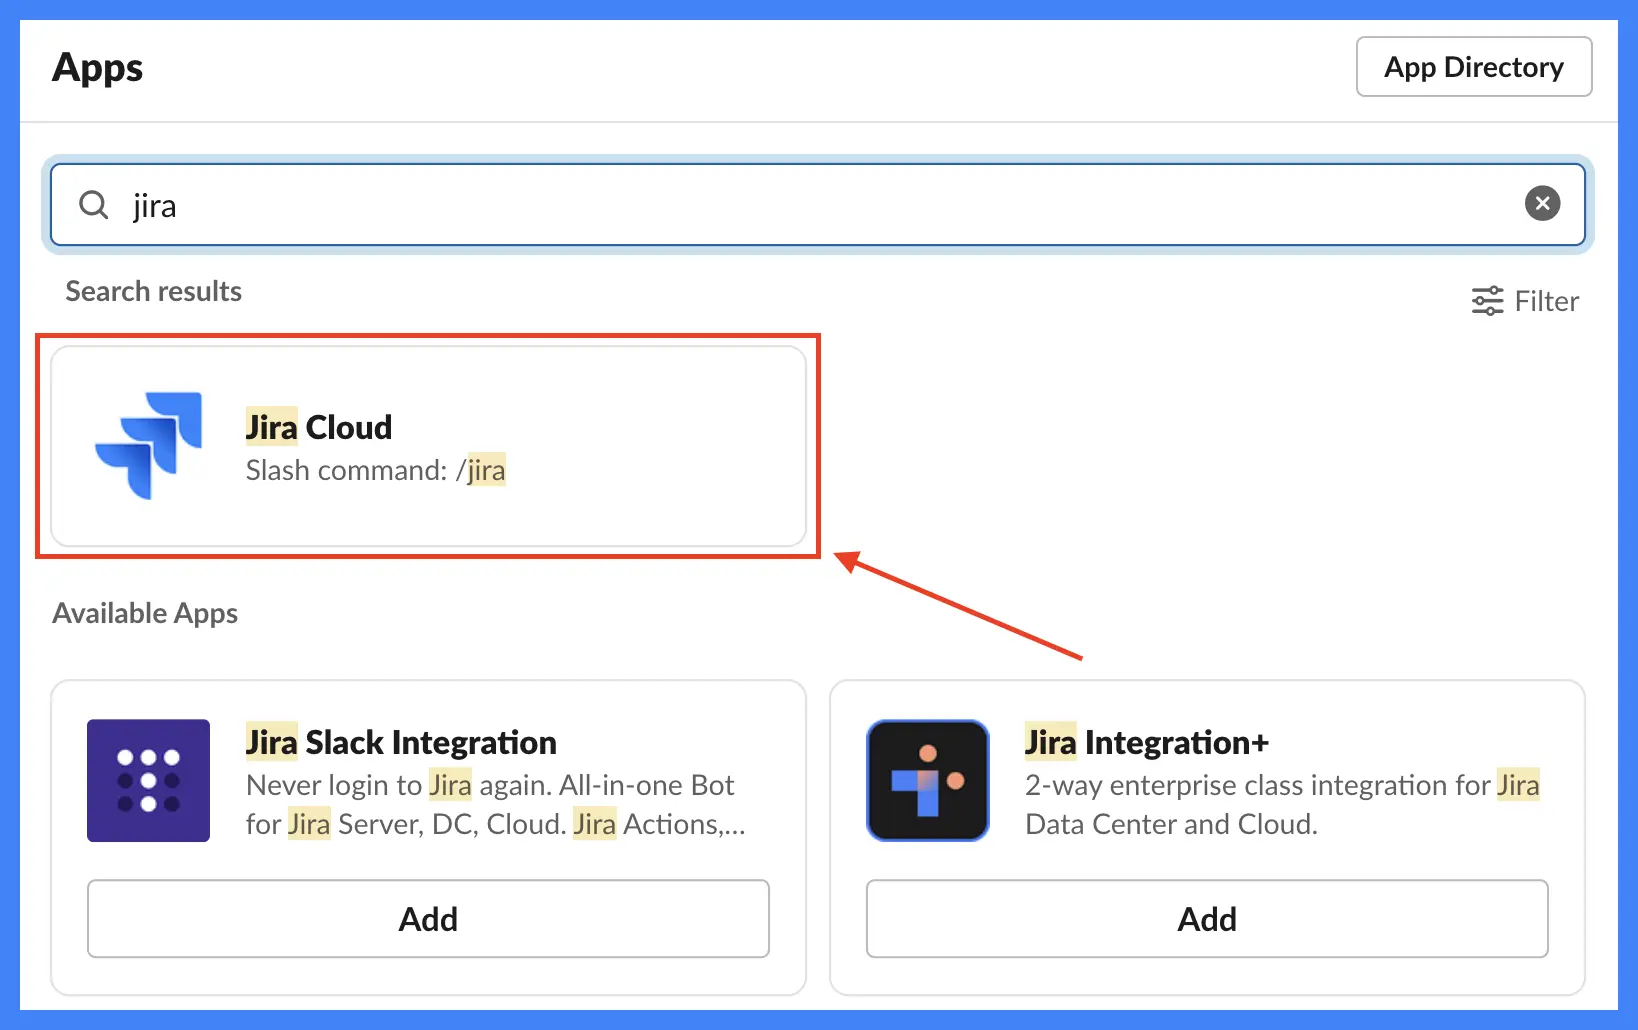
Step 1: Select Jira Cloud from Slack’s App Directory
Add Jira Cloud to your Slack workspace by going to the Apps dropdown at the bottom of your Slack sidebar. Click Add apps and then search “Jira” in the Apps search bar. Select Jira Cloud.
Step 2: Add Jira Cloud to your Slack Workspace
Start the integration process by clicking “Configuration” and then, once redirected to the Slack App Directory, click “Add to Slack”.

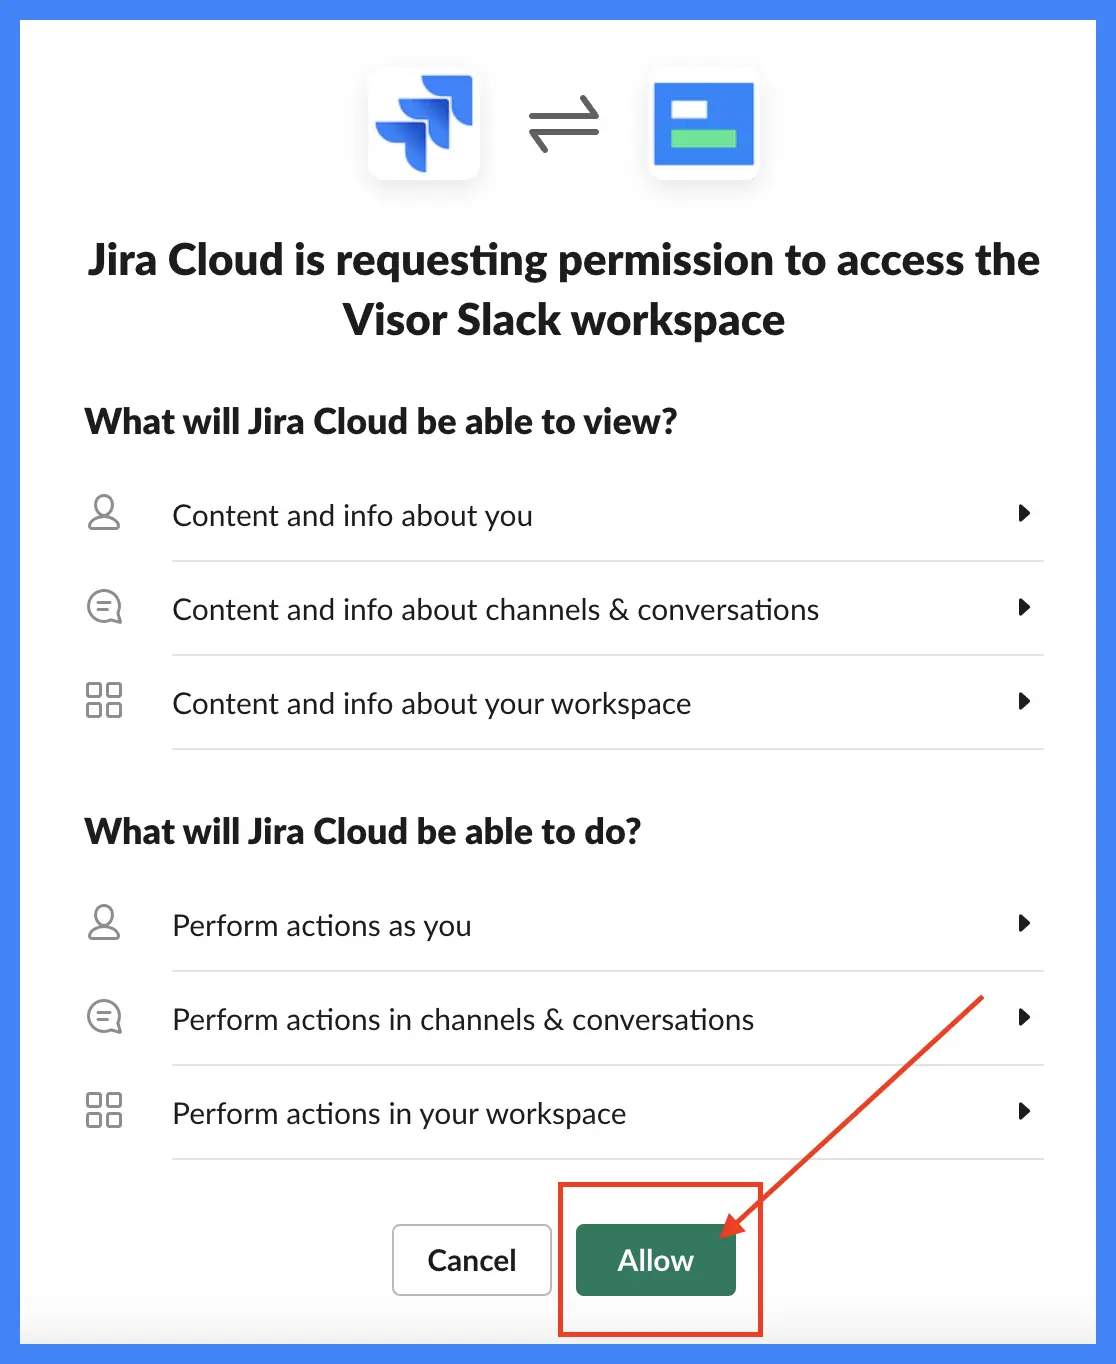
Step 3: Authorize your Atlassian account to link to Slack
Once you’ve started the integration process, you’ll be prompted to authenticate your Atlassian account and to allow it to link to Slack.
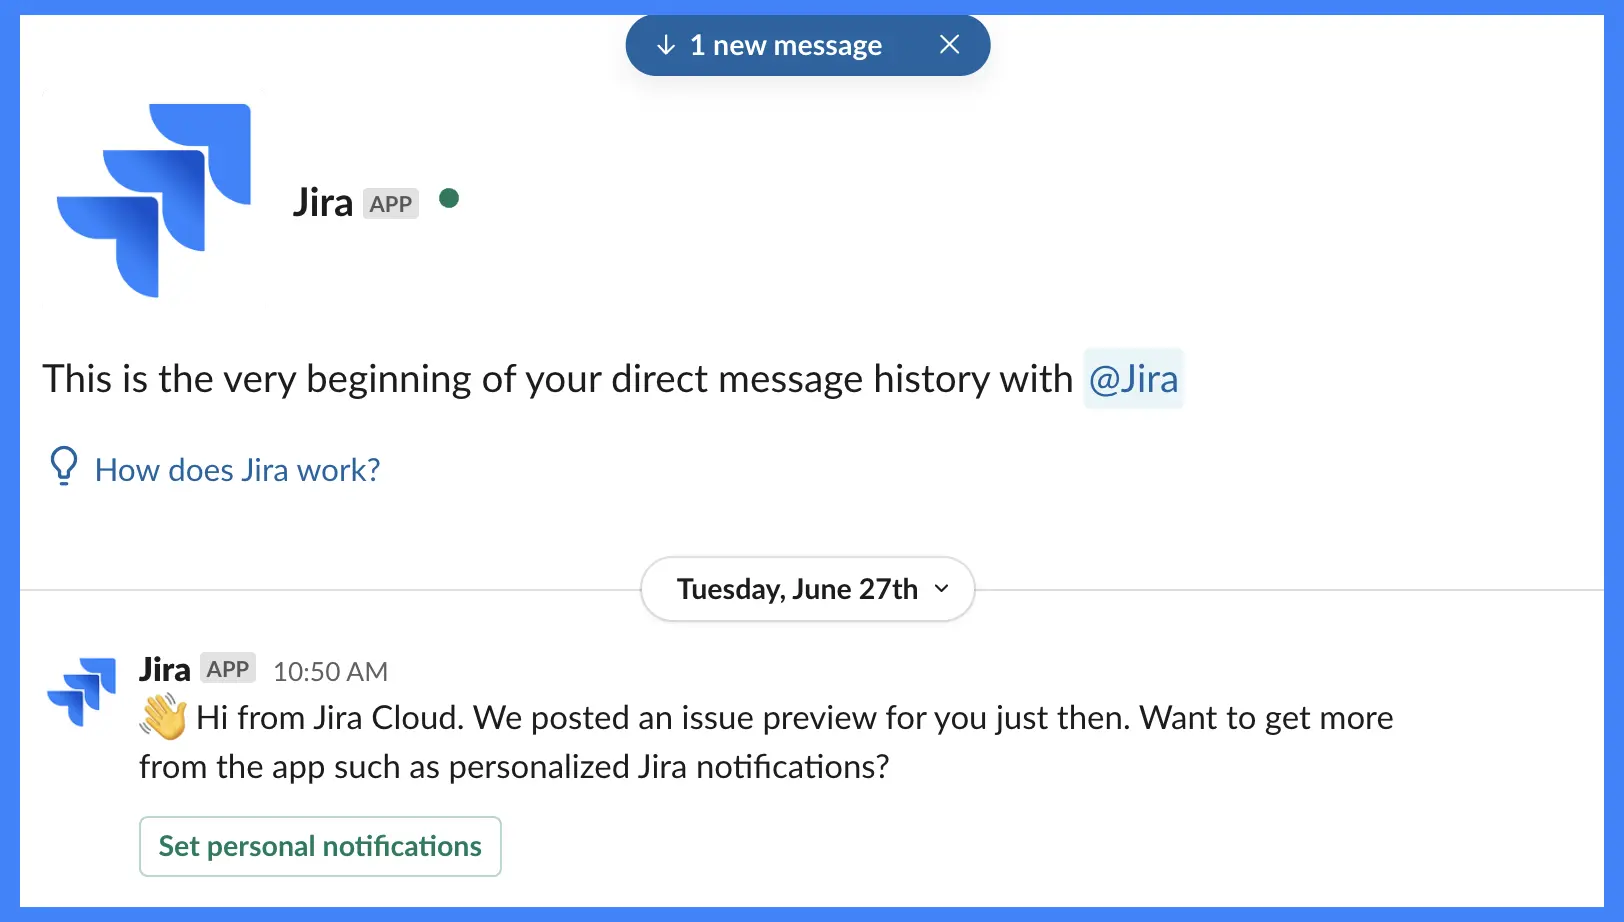
Step 4: Connect your first Jira project to Slack
Once you’ve authenticated your Jira account, you’ll receive a direct message from the Jira Cloud app in your Slack workspace. That message will prompt you with ideas to get started and an overview of available actions.
Making the Most of Your Jira Slack Integration
Jira integrations are great for collaborating with stakeholders who aren’t always in Jira, for newbie Jira users, and for Jira power users and PMs who want to maximize efficiency.
If you want to make your Jira workflows optimize for efficiency, integrations are a great way to go. Jira offers so many great integrations. You can connect Jira with Salesforce, see your GitHub pull requests in Jira or connect Jira with other project management tools (like Asana).
No matter what integrations you pursue to get the most out of Jira, Visor can help you provide visibility across your entire Jira project portfolio. We offer a ton of templates that make it easy to create Jira Gantt charts and roadmaps that you can share with anyone. (You can even copy and paste the links for our Jira charts and reports in Slack.)
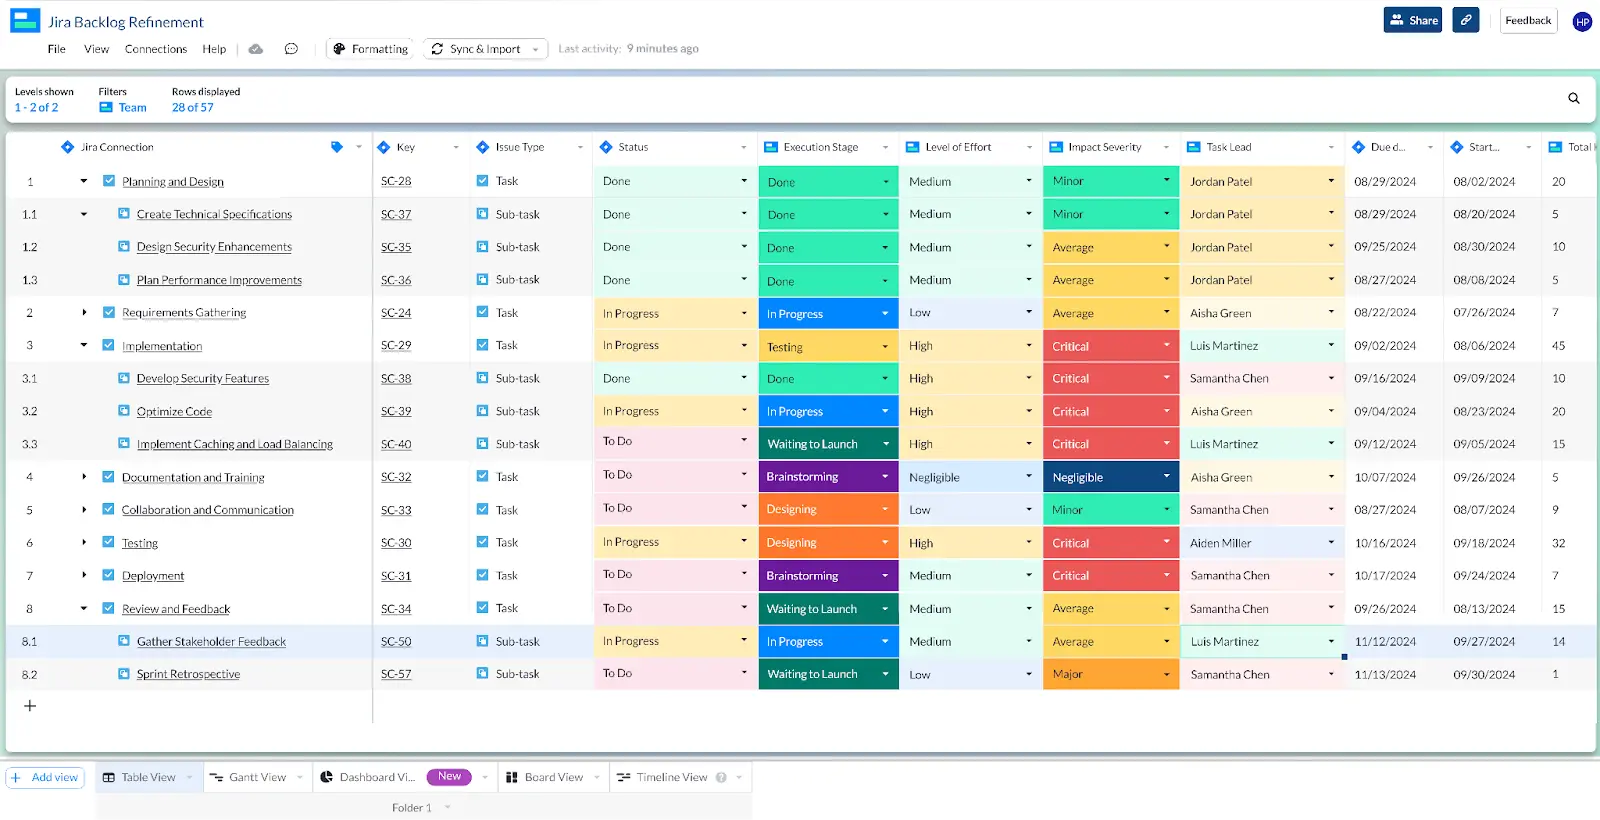
Example of Visor’s Agile Project Plan Template with Jira Data:
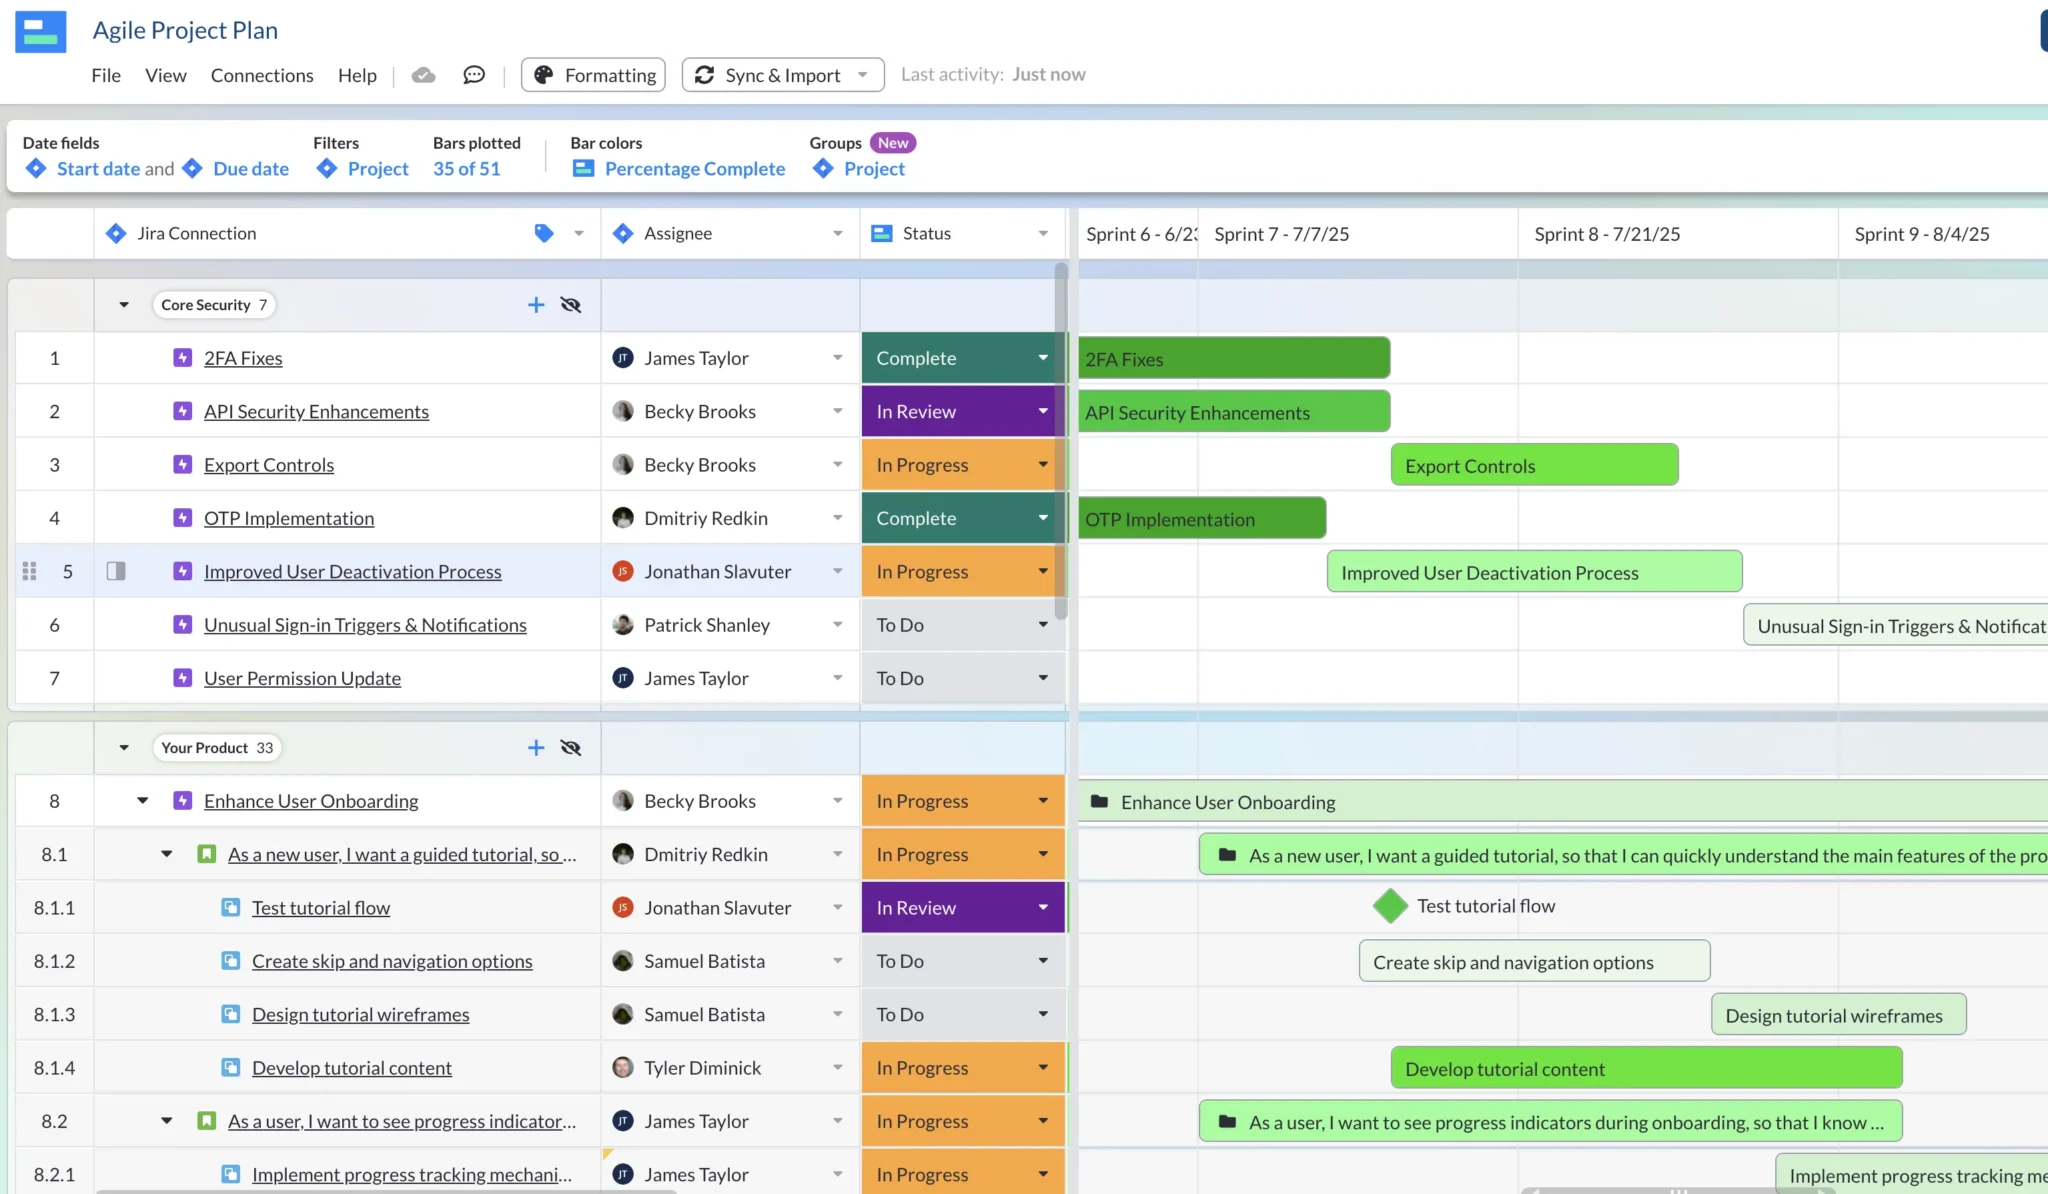
Visor is the modern way to present your Jira data in a variety beautiful, crystal clear views. It’s free to get started and comes with a Jira integration out-of-the-box. In addition, our AI Smart Templates, such as our IT project plan template, make Visor one of the easiest AI project management tools out there.