
The Essential Jira Backlog Grooming Guide: Best Practices & Tutorials


Start using Visor today
- Visualize all your projects and data

- Roll up multiple projects into portfolio views
- Try Visor for FREE
Jira backlog grooming often sounds like a chore to many. However, it’s the backbone to effective sprint planning and efficient agile team management. It also doesn’t need to be tedious.
In fact, with the correct practices, workflows, and organization, Jira backlog grooming can be fruitful and insightful; it can also make for easier sprint planning in the future.
In this guide, we’ll cover:
- The most practical tips for backlog grooming
- Three ways you can refine your Jira backlog
- Why backlog grooming makes agile teams more efficient
- Video walkthroughs to help your Jira backlog grooming
If you want to make the most of your Jira use, you’ll need an excellent way to visualize and share your project data. That’s where Jira project portfolio management tools like Visor come in! Visor allows you to turn your Jira data into clear dashboards, charts, and so much more. Compare our pricing to Jira
What is a Jira backlog?
A backlog is simply a list of work to be done – or in Jira terms, a backlog is where you create, manage, and house the Jira issues that your team is working on.
A backlog lets you define work and set priorities so that you can determine which tasks have to be tackled right away and which need to be handled down the line. Whether you’re grooming a backlog of tasks for a sprint or refining a product backlog from your roadmap, many Jira issues can end up in your backlog.
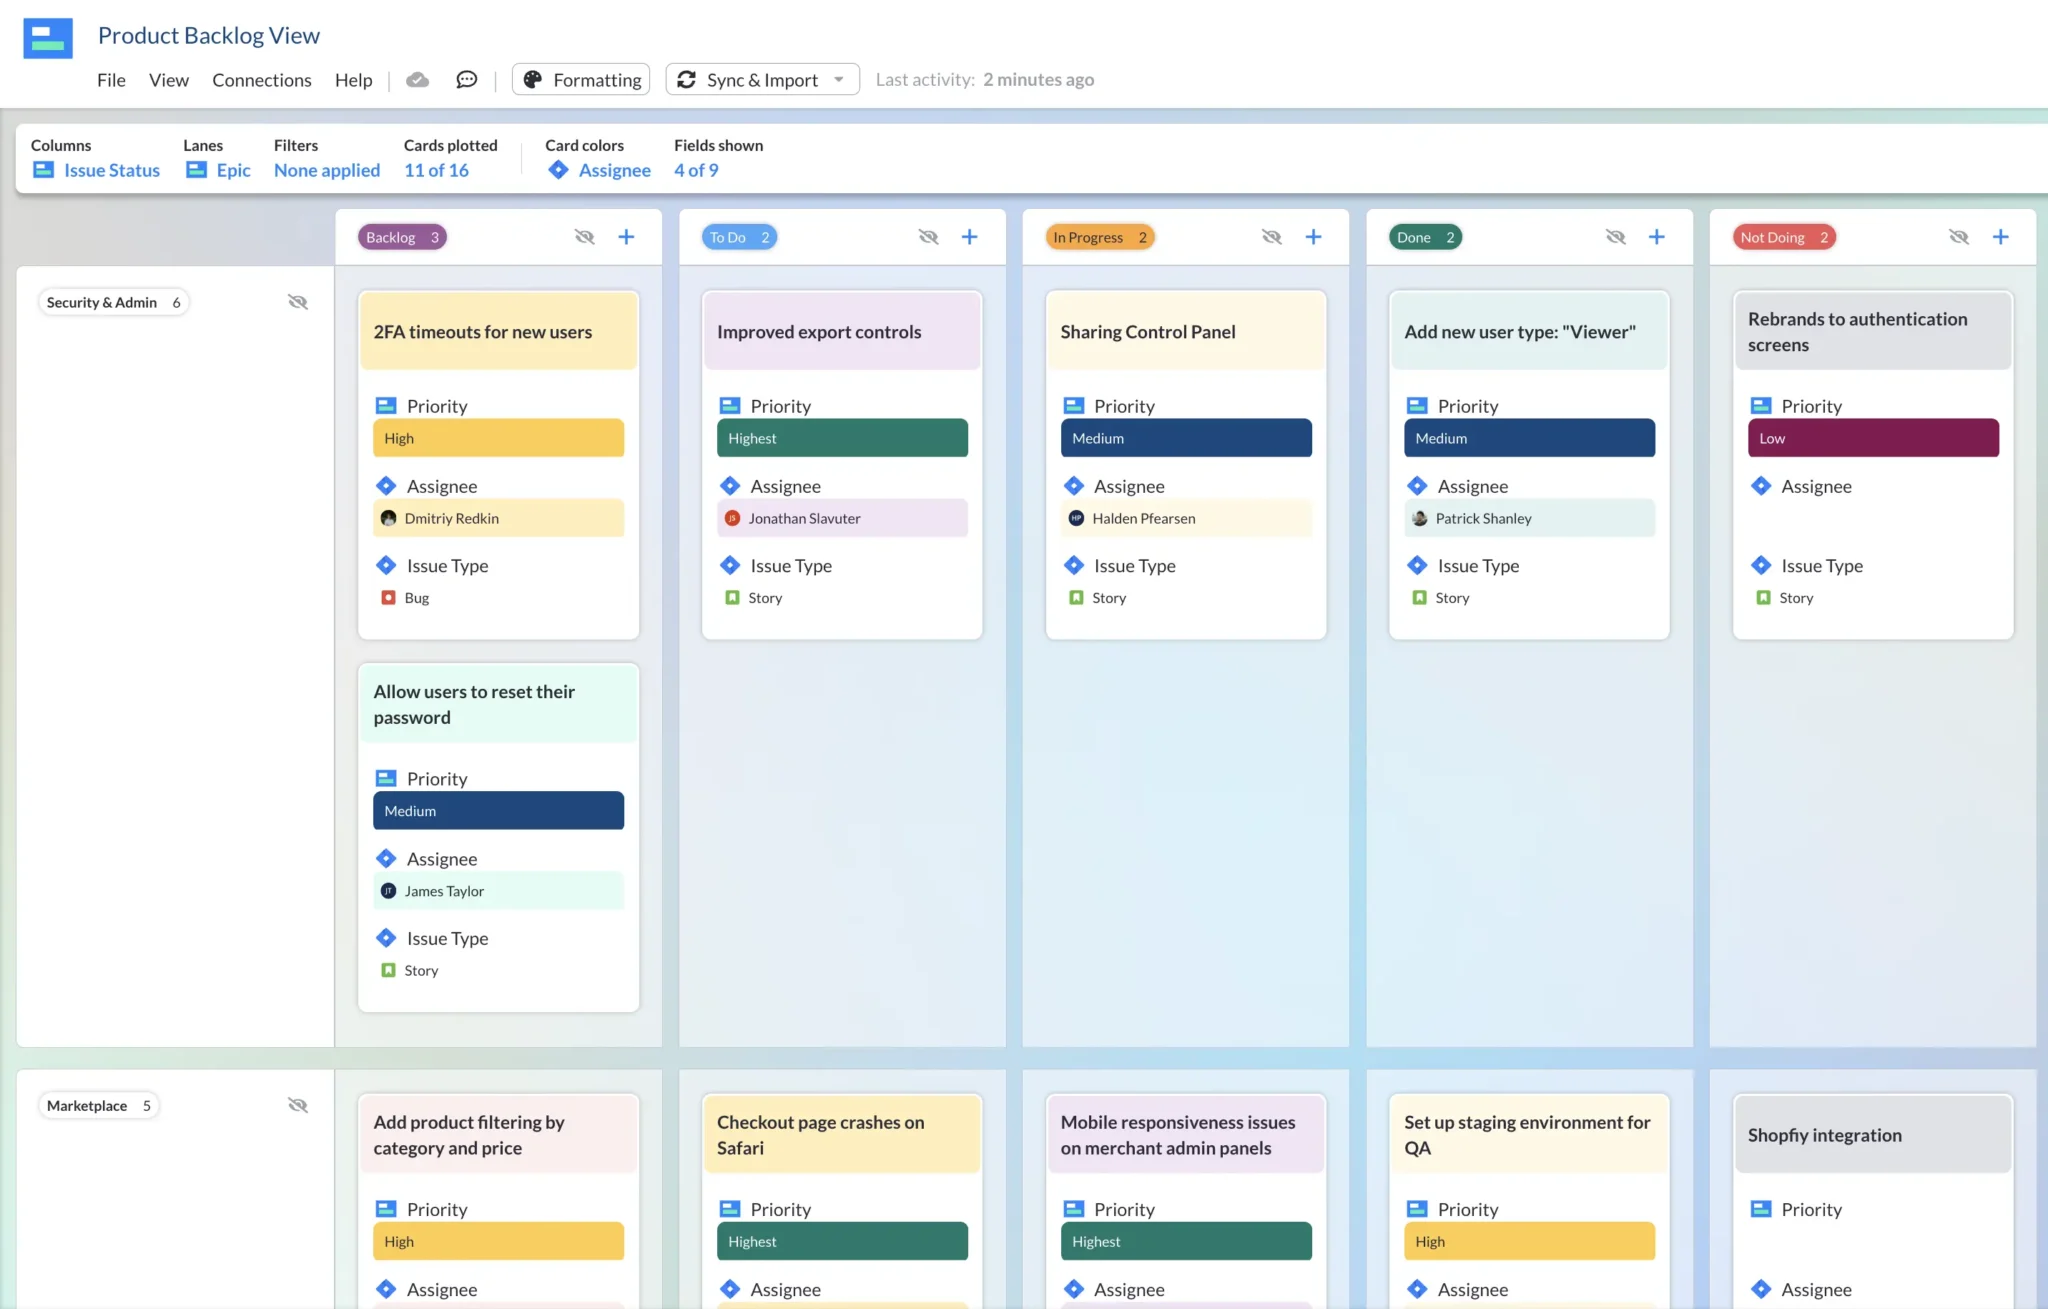
Product Backlog Template, created in Visor with Jira data:
Why do I need to do Jira backlog grooming?
Whether you’re working with a project or a product backlog, it’s important to regularly review it to ensure the issues in your backlog should be there and are prioritized accurately. This process is called backlog grooming or backlog refinement.
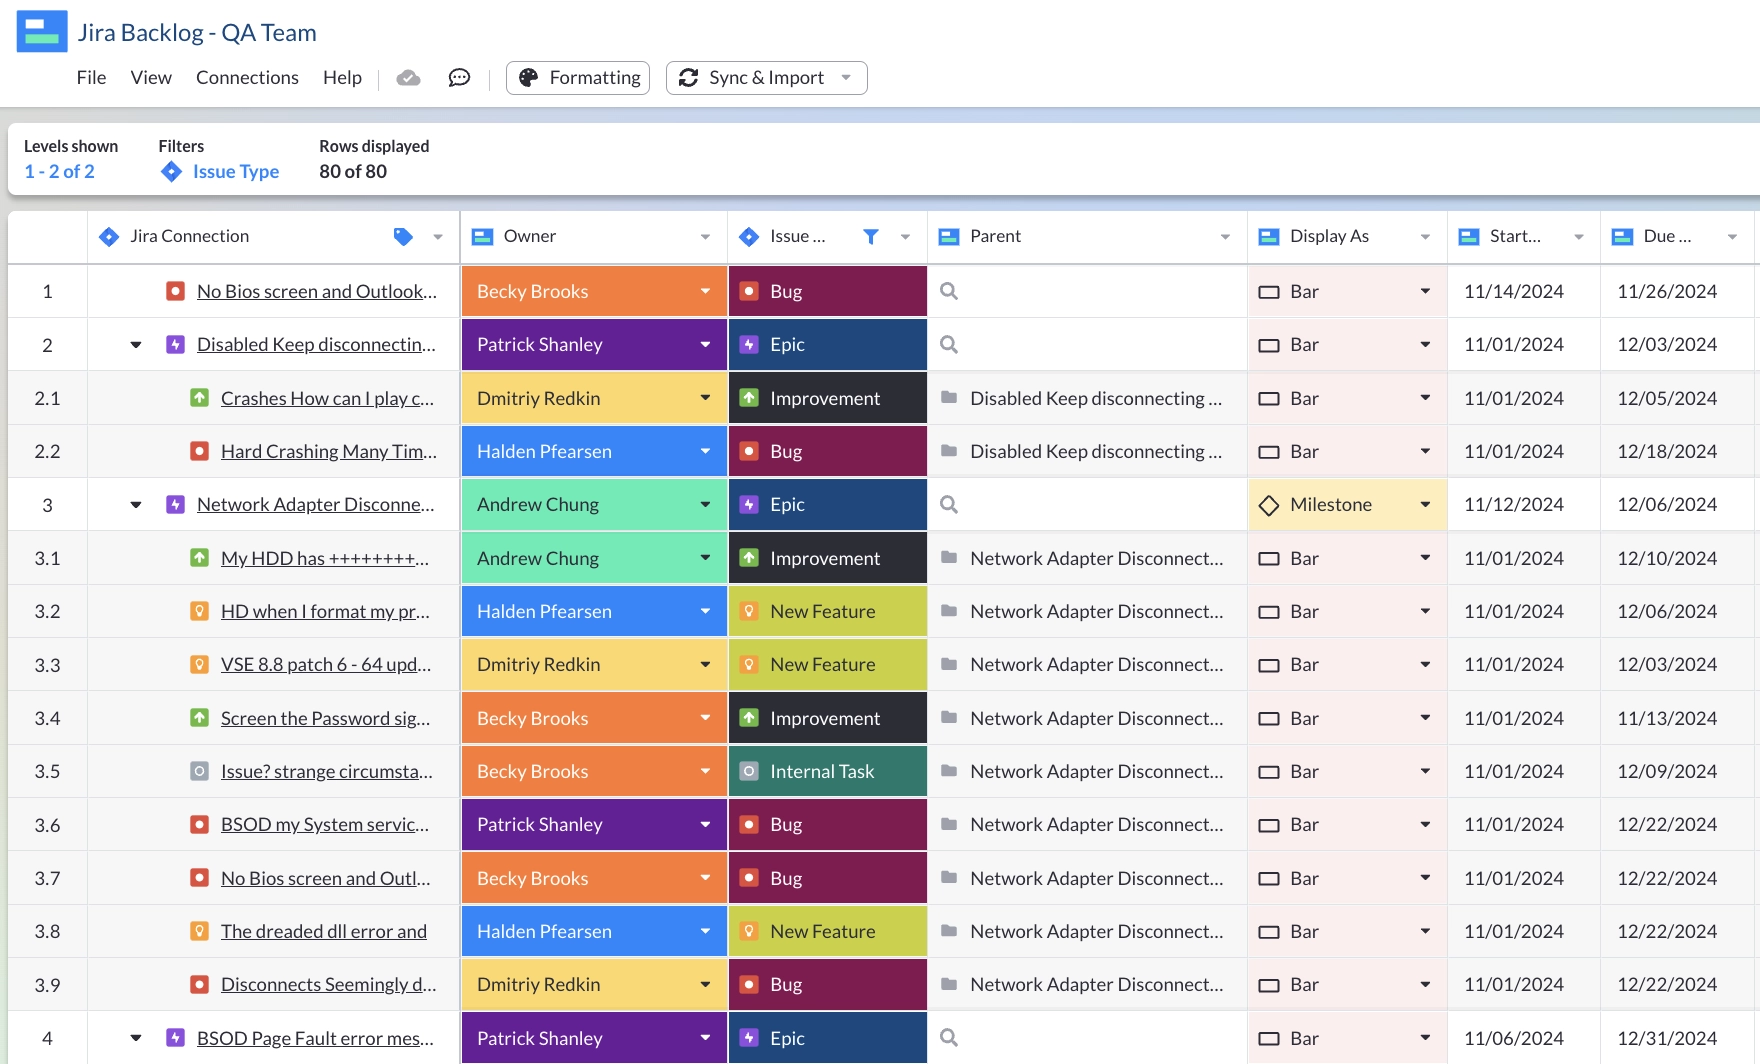
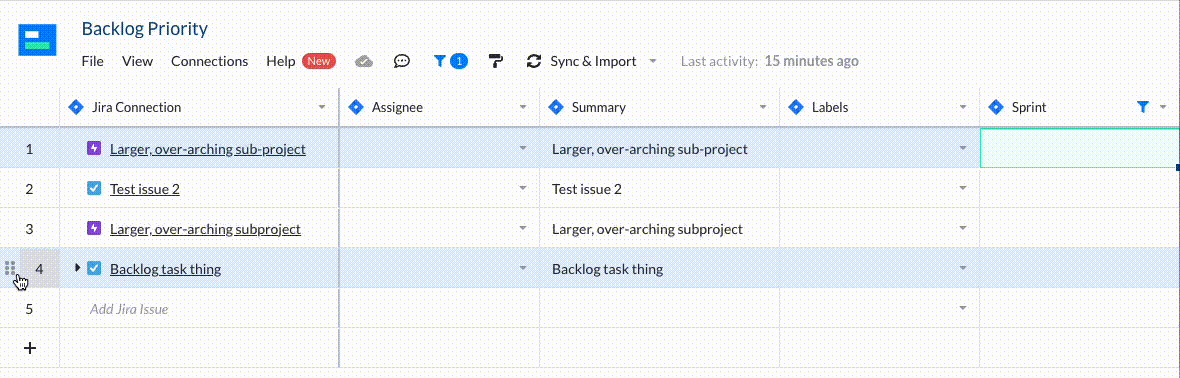
Example of Jira Backlog in Visor’s Spreadsheet:
Backlog grooming might include:
- Closing out outdated issues
- Adding new issues
- Adjusting priorities for issues in backlog
- Assigning and adjusting estimates for how long it may take to complete an issue.
If you’re new to Jira backlog grooming, we have best practices listed below to help guide you. In addition, we have a few options that you can approach backlog grooming. These options include refining your backlog entirely within Jira or using Visor’s Jira spreadsheet to help you set priorities and edit Jira data in bulk.
Why is Jira Backlog Grooming necessary for agile teams?
Because agile teams work in sprints, your backlog is often where you will go during sprint planning.
However, not all Jira issues are equal in terms of importance. In fact, some Jira issues never materialize into work. Because both Scrum Masters and project managers typically store all potential work in a Jira backlog (using Jira’s ticketing system), all Jira issues don’t carry the same weight.
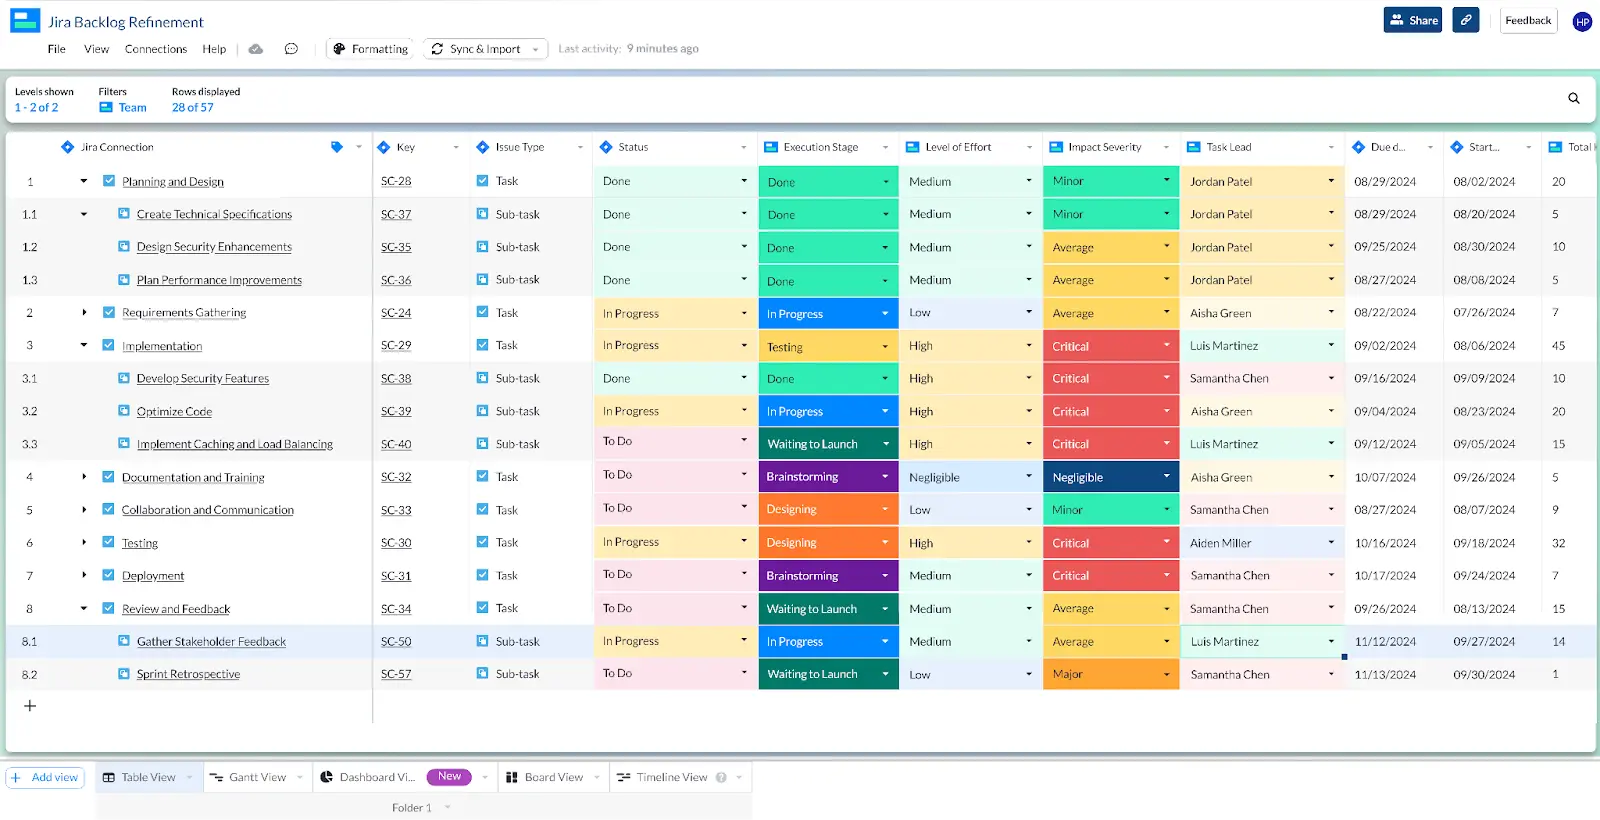
Refining a Jira backlog using Visor
When certain Jira features and stories are more strategically important, you want to be able to rank and order your backlog accordingly. Your backlog needs to reflect that not all work is high-value work.
However (despite the meme above), the backlog isn’t necessarily where things go to die.
Much like a garden, your backlog can get overtaken by “weeds” of dead or irrelevant tickets if it is not properly maintained. To ensure that every issue is still relevant, you should make cleaning and organizing your backlog as regular and scheduled as possible.
Jira Backlog Refinement Tips & Tricks
1. Refine Your Backlog Before Sprint Planning
Refining your backlog before sprint planning will help you run more efficient meetings and gain alignment with your team faster about the next sprint.
Jira backlog grooming should, therefore, happen before sprint planning. However, it shouldn’t happen too far in advance. Because project details change, consider refining your backlog just a couple of days before your sprint planning meeting. This way, you’ll likely have a backlog that reflects reality.
You can also use simplified project scope templates to help you set clear scope boundaries when embarking on larger pieces of work (setting the scope for epics for example). This can then help ensure your sprints are targeted and managable.
2. Plan ahead for the “next harvest” and make a v2.
Even if you try to bust scope creep, it can still, well, creep in. To avoid having great ideas go to waste, make a v2 Epic or Project for any Stories or Tasks that do not fit into the current scope. That way, all your ideas for another iteration of the project live in one place and can be linked to the MVP or v1 of the project for future reference.
Placing ideas into a “v2” category allows items to live in your backlog in a clear, organized way and helps set priority between new projects and future iterations of current projects.
3. Find a prioritization method that makes sense for your organization.
Whether sorting by priority or story points, only you know what works best for your organization.
If you are working on a larger project, it might make sense to have items that complete it at the top of your backlog. Similarly, suppose you have some team members who have extra time on their hands. In that case, it might make sense to have some iterative or improvement tickets closer to the top for visibility so idle team members can pick up lucrative projects or quick wins.
Whatever your current project ecosystem is, implement items such as tags, labels, or estimated due dates to help set priority and give team members a clear picture of the work to come.
4. Set a percentage of sprints toward bug squashing!
It’s easy to get shiny new toy syndrome with cool feature requests and new designs, but don’t forget to “eat what’s in the fridge.” Forgotten bugs, tech debt fixes, and “someday, not now” improvements that could benefit your current users are often rediscovered with thoughtful Jira backlog grooming best practices.
Whether you use story points, t-shirt sizing, or some other metric of measuring your work in sprints, dedicate some percentage of work to fixing broken things, improving things that might be slow or outdated, and setting your future projects and architecture up for success. You’ll thank yourself later.
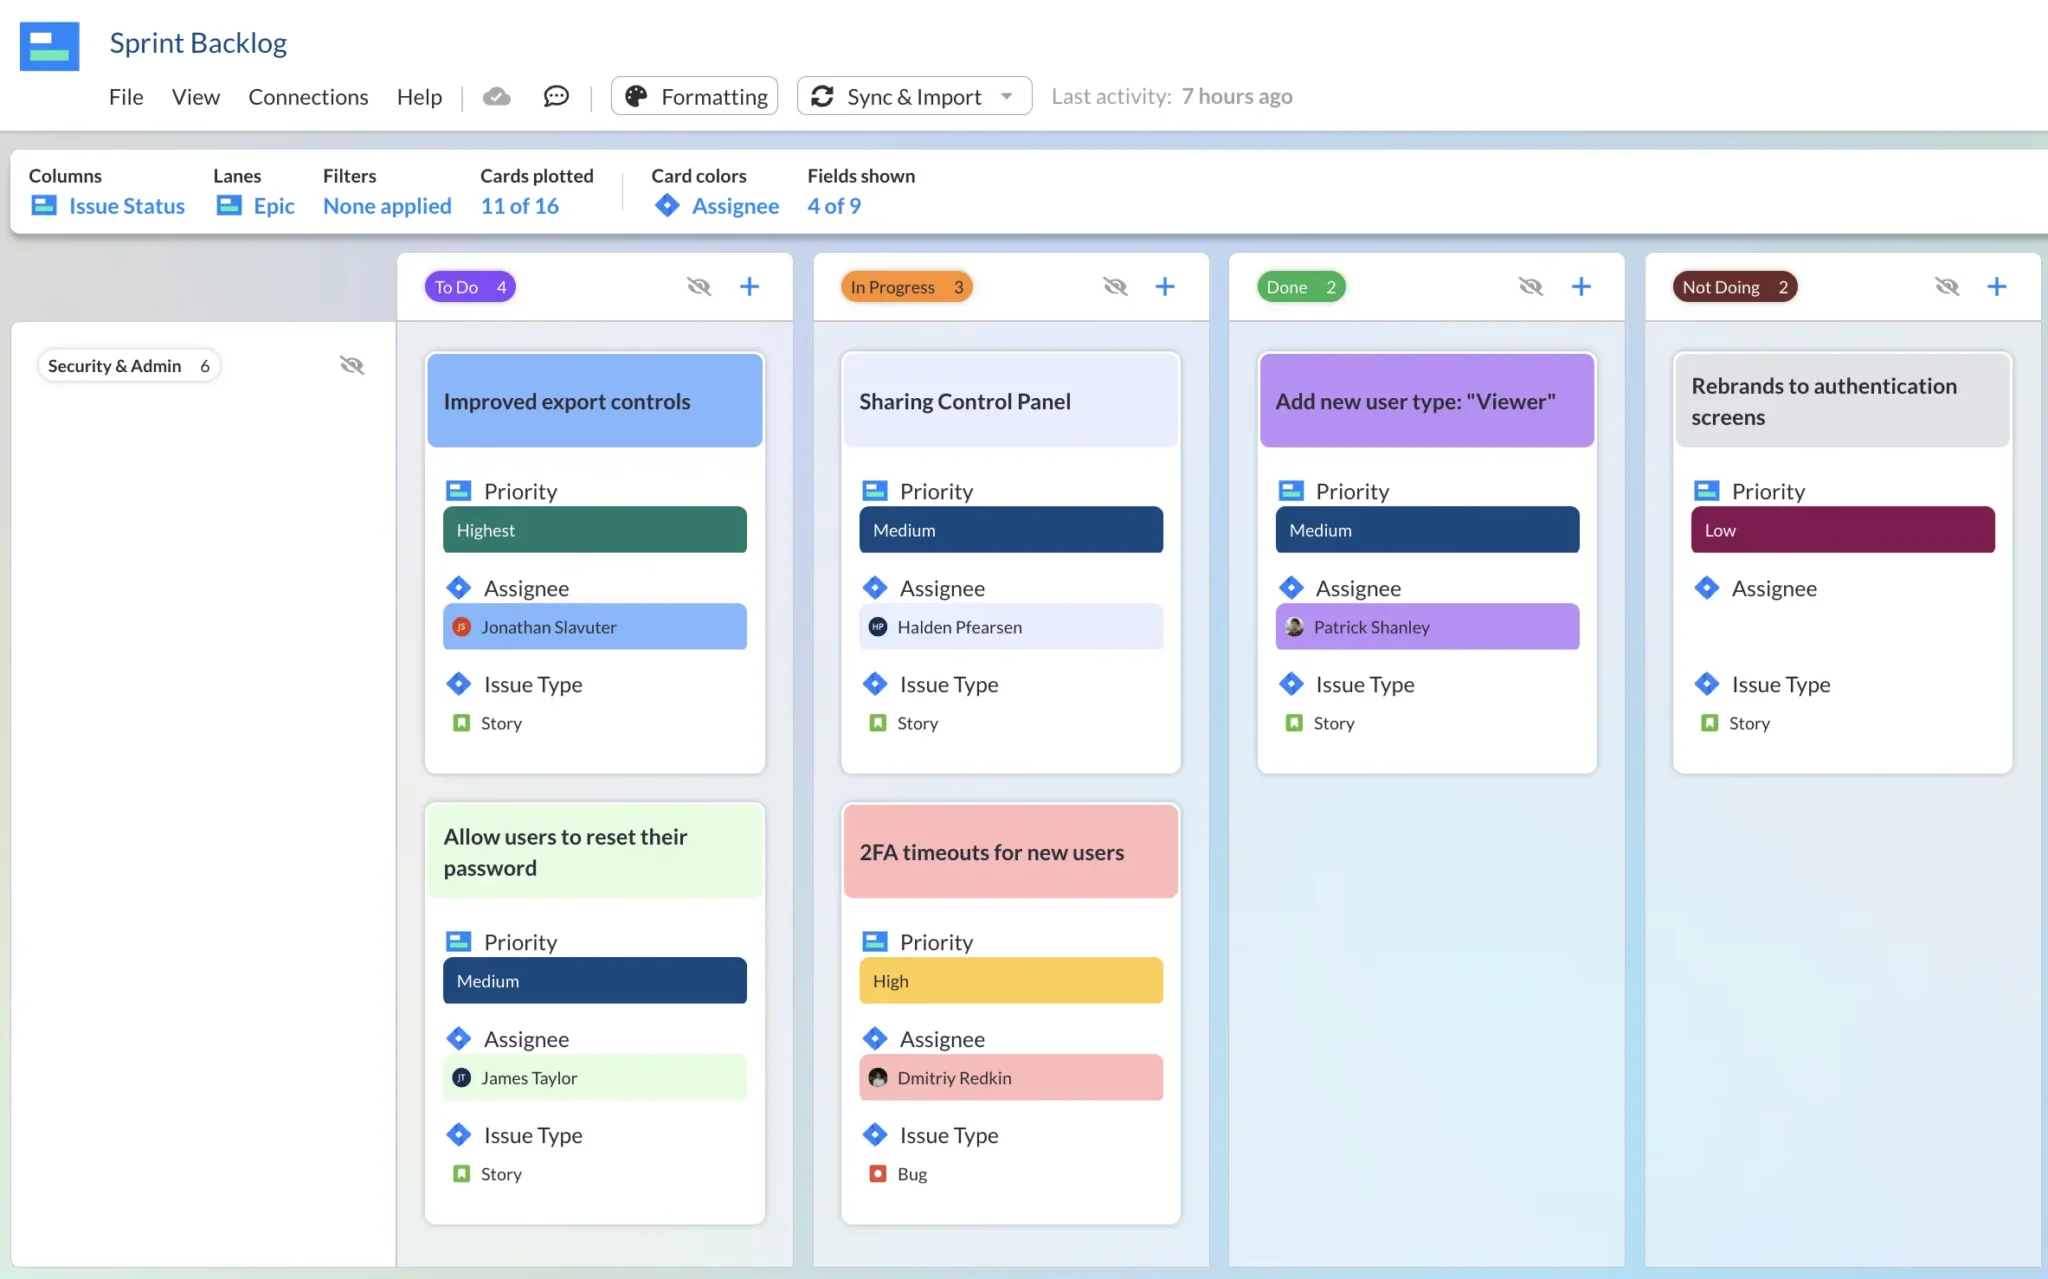
Sprint Backlog Template in Visor:
5. When in doubt, spec it out.
Recency bias is a massive factor for many teams while triaging issues during Jira backlog grooming. That’s why providing as much detail as possible in the initial ticket creation is vital so that if and when a ticket ends up in the backlog, there’s some context to it.
The worst thing in the world is finding a ticket with a promising issue summary and no further detail. What project was it for? How did it fit into the current project scope? What was the intended behavior? Even something as quick as a few bullet points or notes in the description can be a timesaver later on. It’s worth the upfront investment, trust me.
6. Keep business needs in mind.
Everyone knows that projects and businesses often require agility and pivoting. For example, perhaps retention was your company’s original priority, but now you’re focused on expansion. That’s okay! You don’t have to abandon ship or start over fully.
Just make sure you keep the business needs and expectations of executives in mind when grooming your backlog. Consider alternative statuses like “Held Back” or “Pivoted” for items that might return to priority once circumstances change.
7. Don’t get sentimental; trash vague and empty tickets.
Much like how you wouldn’t keep a dead plant on the windowsill, you don’t want to take up precious space with tickets that aren’t clear. You’ll waste less time during refinements trying to figure out what Steve meant by “Better button on homepage” in 2019.
You may have created the ticket during a flash of inspiration from an employee no longer working with you, or it was part of an irrelevant project. Whatever the case, there’s no reason to raise these ideas from the dead, and if they’re really that important, they’ll come back to you. Better to keep things clean, concise, and well-thought-out. That way, every ticket that comes up has value.
Visor’s Jira Spreadsheet allows inline edits:
Jira Backlog Grooming Option #1: Filter with Jira Labels
There are three main ways of filtering your Jira backlog – by using labels, by using JQL, or by using Visor. Here’s how to do so with Jira labels.
For this method to work, it helps to have Backlog as a label. If you do, then filtering backlog is a simple process.
Step 1: Create a Filter
First open the project you would like to work on. Go to the Filters dropdown menu at the top of the page and select View All Filters.
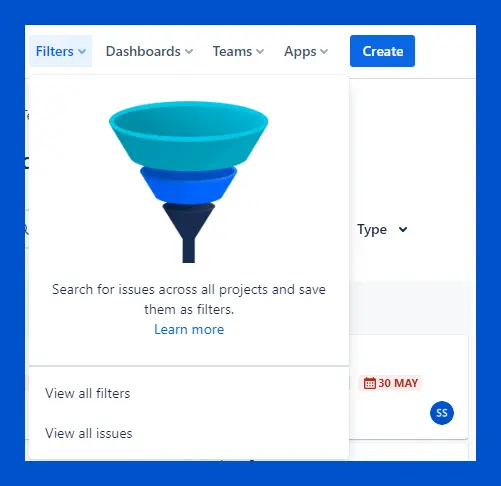
Click the Create a Filter button on the right-hand side of the screen.
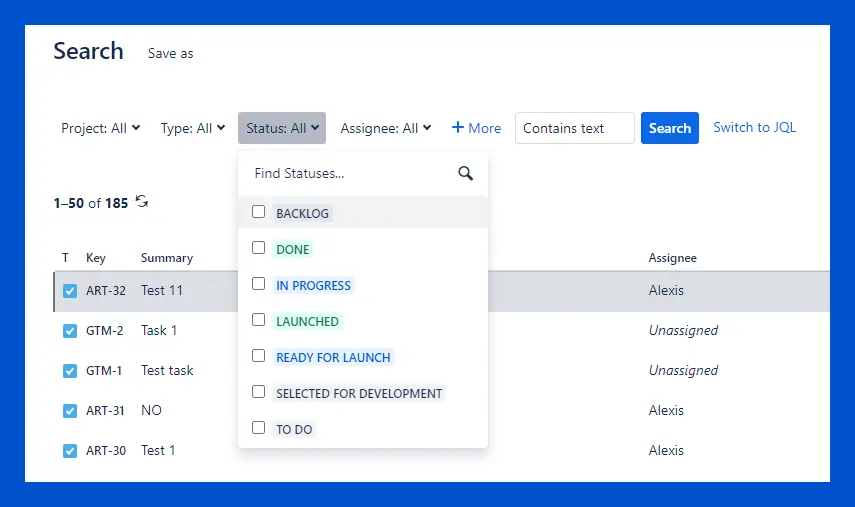
Step 2: Choose your filter
Select the dropdown menu where you have backlog saved as a label (in the screenshot below, you can find it under Status). Select the checkbox labeled Backlog and Jira will filter for that label.
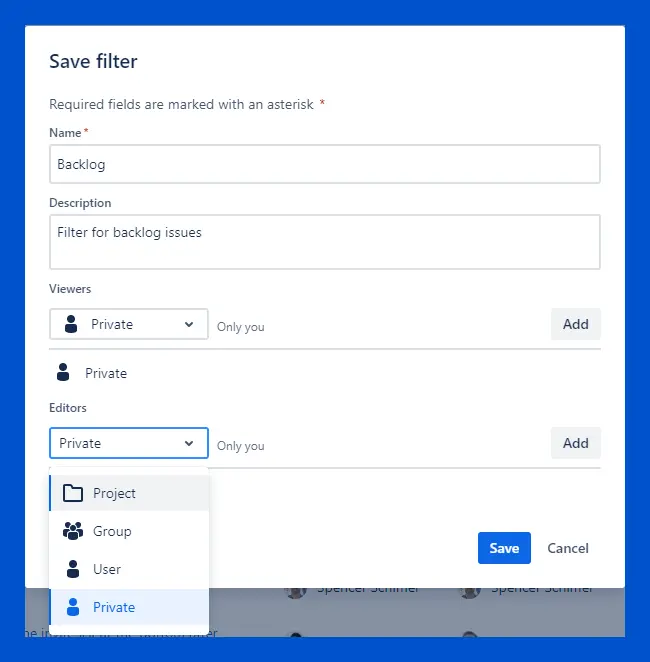
Step 3: Save your filter (optional)
If you’d like to save your filter, select the Save Filter hyperlink to the right of the filter search dropdown menus. A popup will appear, which will prompt you to enter a name, description, and viewing and editing permissions.
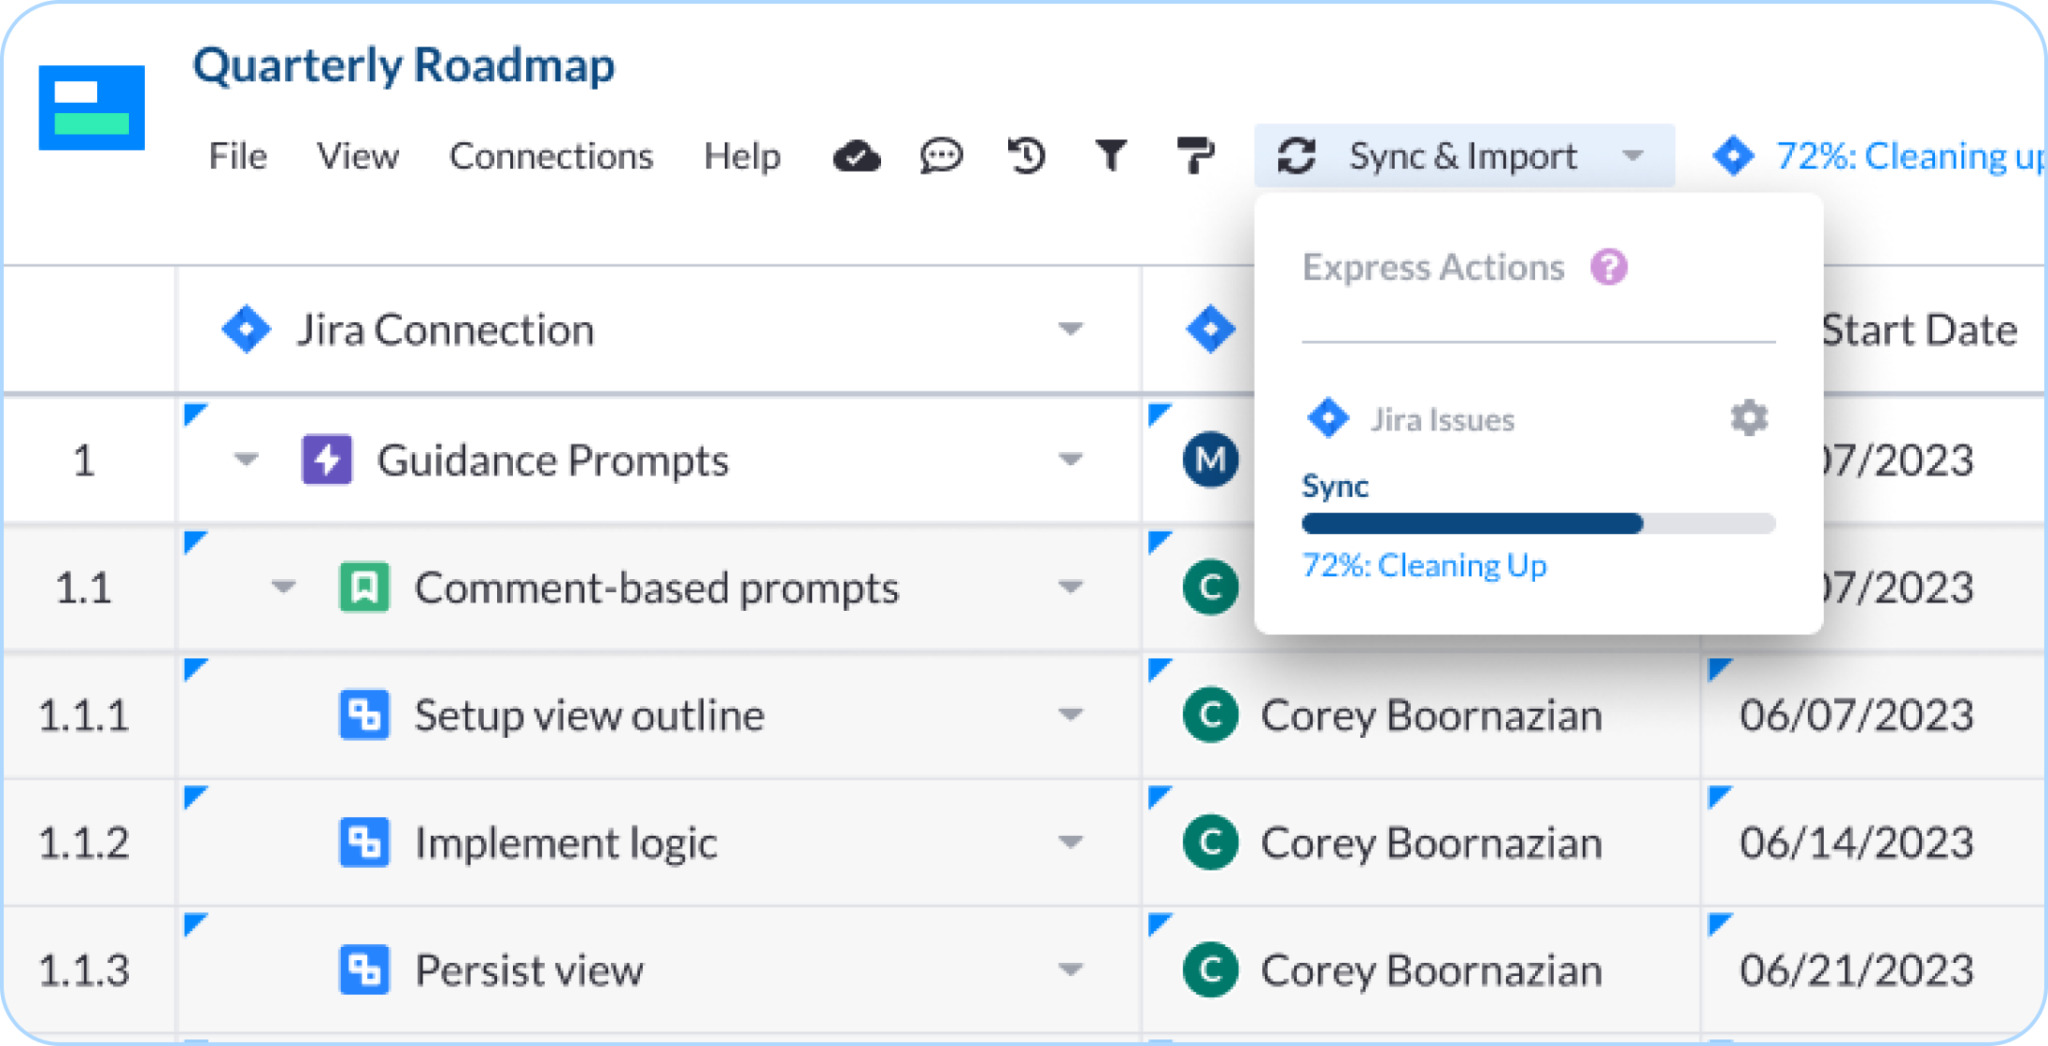
Jira Backlog Grooming Option #2: Visor’s Jira Spreadsheet
In this section, we’ll show you how to prioritize and refine your backlog using Visor’s Jira spreadsheet.
Visor, an official Atlassian Marketplace Partner, helps with an essential step in Jira backlog grooming: setting priorities.
However, it can be hard to set priorities in Jira when stakeholders and plans aren’t solidified. That’s where third-party applications, like Visor, can help. Visor syncs with Jira, allowing you to visualize your project data and add filters.
Below is how you can quickly set priority to many items in your Jira backlog using
We also provided some tips on using custom fields to visualize and plan your future sprints.
Step 1: Import your Jira data into Visor.
When importing, select the Sprint field as a field to import. This will be crucial for the process.
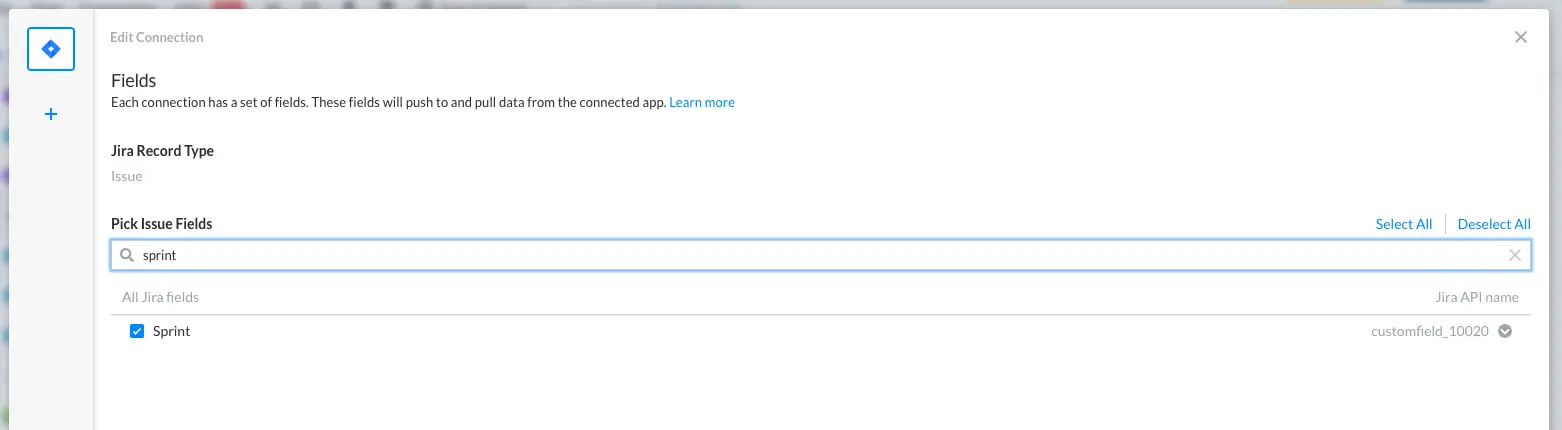
Step 2: Isolate Blank Sprint Fields with Filtering.
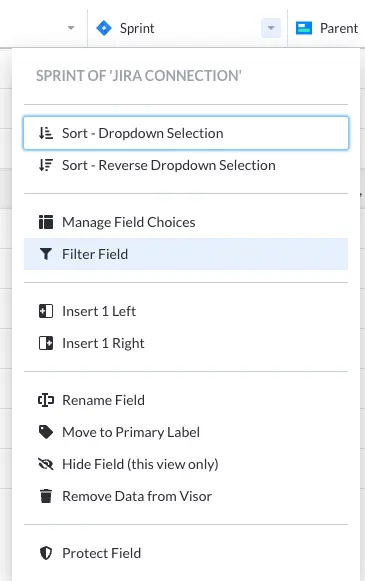
Once you import your data, you will see that the Sprint column has some cells populated with Sprint names and others are blank. The rows with blank cells are the records currently in your backlog. To isolate these records, click the arrow to the right of the column name. Select “Filter Field,” and then, from the Filter menu, select “(N value).”
Step 3: Drag and drop the isolated issues to set priority in Visor.
Now that you’ve isolated issues in your backlog, you can drag and drop to set priority in Visor.
From here, aside from dragging and dropping, you can also assign sprints, change assignees, and add notes or estimated due dates with Visor custom fields. Custom fields allow you to make notes or changes that won’t be pushed to Jira when you sync and are perfect for planning, ideating, or visualizing rough timelines.
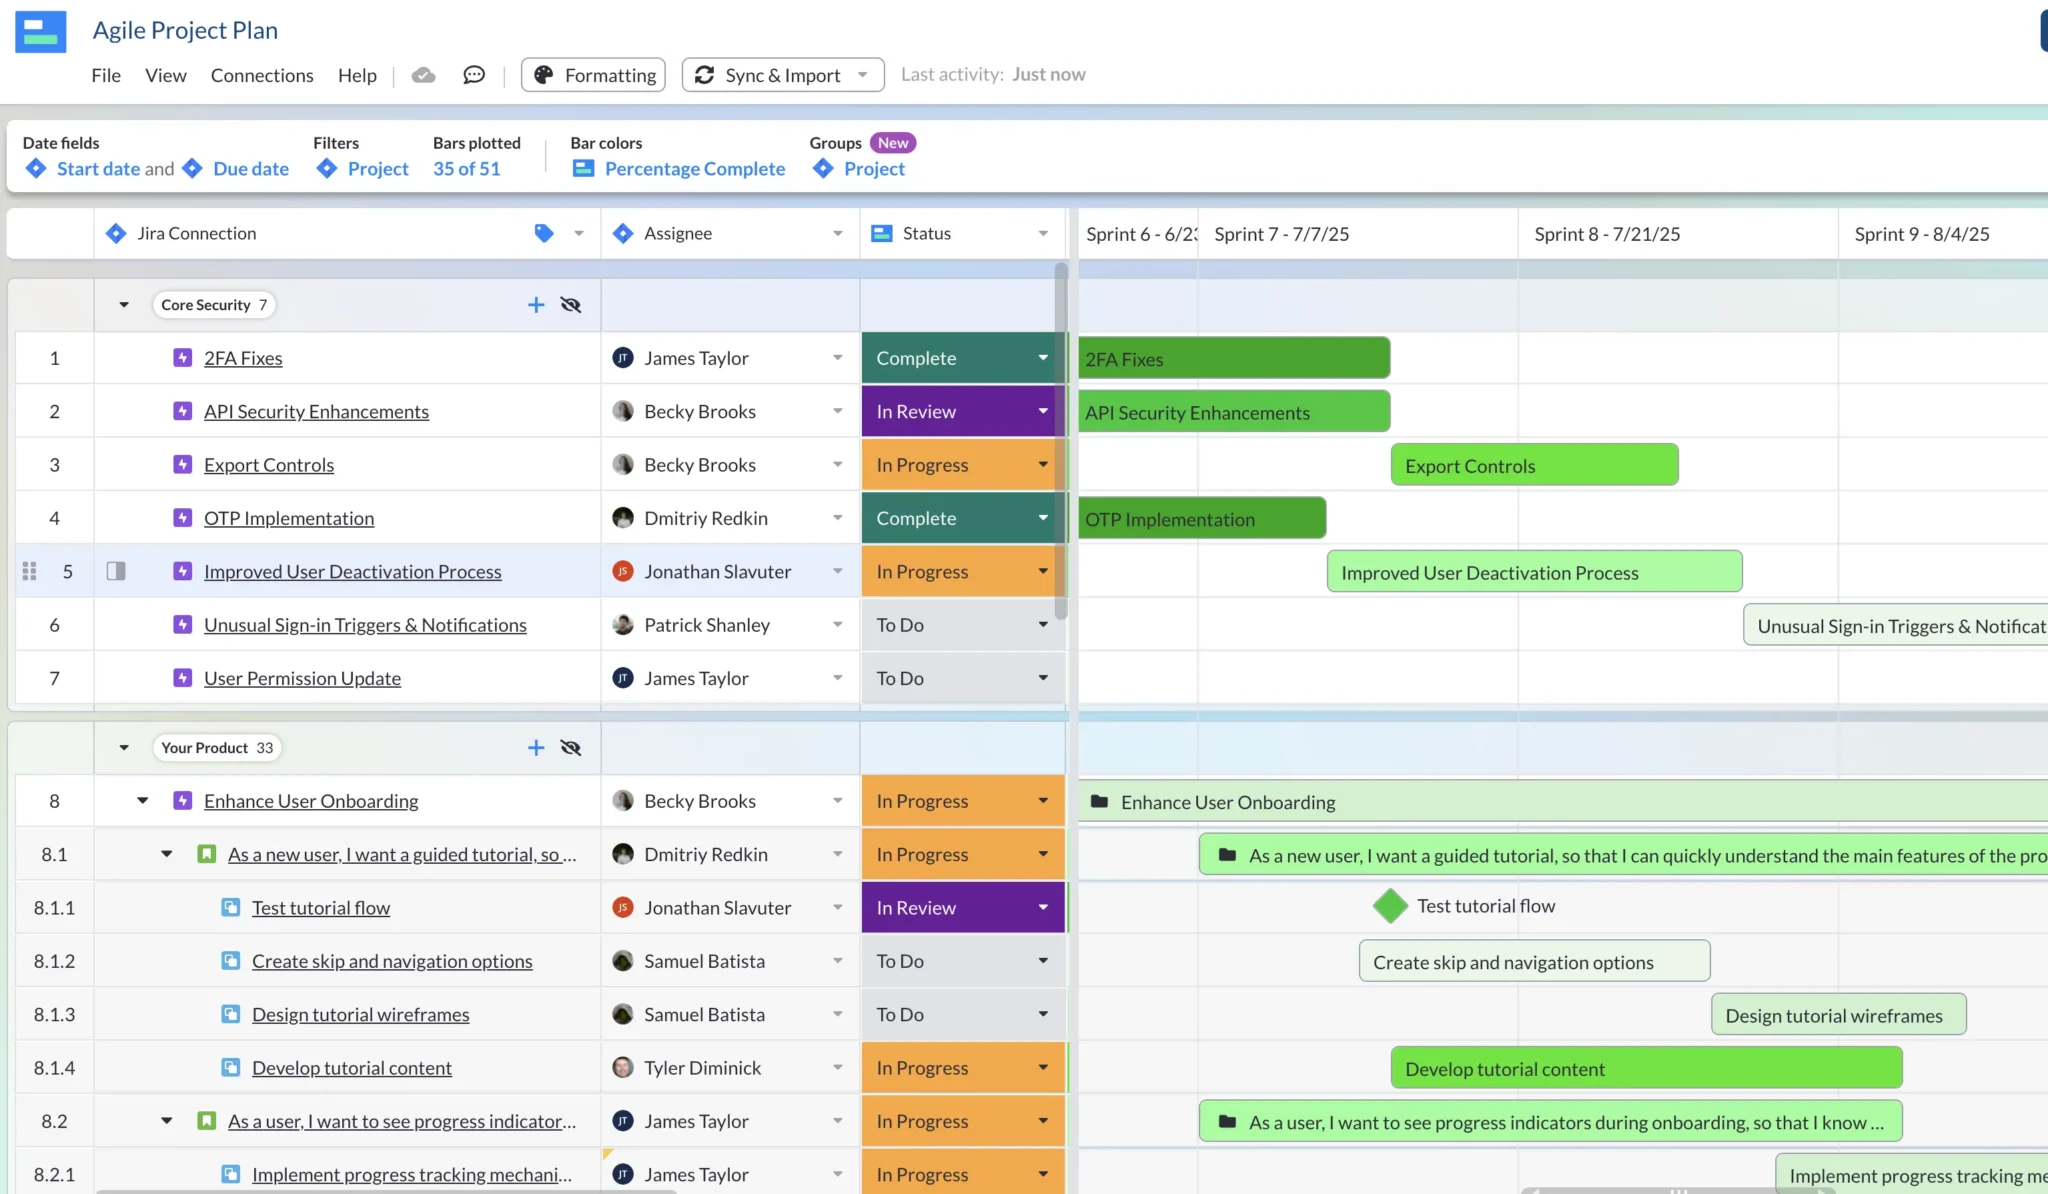
A prioritized, nested backlog in Visor
Jira Backlog Grooming Option #3: How to Filter Using JQL
If you do not have a Backlog label, or you want a more precise method of filtering for backlog, you can enter filter parameters using Jira Query Language (JQL). If you’re unfamiliar with this query language, we wrote the ultimate JQL cheat sheet to help you get started.
However, assuming you do know JQL, follow the steps below.
Step 1: Create a new filter
Open the project you want to filter, then select the Filter dropdown menu and select View All Filters. Select the Create New Filter button to start your new filter.
Step 2: Switch to JQL
When you open a new filter, you’ll see a series of dropdown menus. These allow you to filter for an assortment of existing labels. On the upper right, you’ll either see a toggle or a hyperlink that will allow you to switch to JQL. Select it, and a box will appear for entering JQL queries.

Step 3: Enter JQL query
At this point you want to enter a query. Include the project you want to search for, the issue types you want to view, and include all your “done” statuses and empty sprints. A sample JQL query you could use to filter for backlog might look like this:
project = <your project> AND issuetype in (<type of issues you want to filter for>) AND status not in (<all done statuses>) AND (sprint is EMPTY OR sprint not in openSprints() AND sprint not in futureSprints())

If you’re not sure how to format your command, you can click the question icon to see Atlassian’s JQL Syntax Help.
Step 4: Save your filter (optional)
To save your filter to use again later, click the Save Filter hyperlink to the right of the JQL query box. A popup will open that prompts you to enter a filter name and description, along with filter permissions.
Jira Backlog Grooming Best Practices and Video Tutorial
If you learn best by watching videos, we summarized the three methods that you can perform Jira backlog grooming in a video. We also go over best practices and tips for making your backlog refinement successful.
When you’re doing project management in Jira, it makes a huge difference to know how to maximize your backlog.
Make the Most of Your Jira Backlog Grooming
Perfect the best practices of Jira backlog grooming to make your backlog ready for sprint planning. Remember to stay organized, “weed whack,” and set clear and thoughtful priorities.
Tools like Visor can make your backlog less scary to tackle. Quickly set priorities in Visor and push out changes to your Jira instance with Visor’s two-way syncing. Once you find workflows and tools that work for you, maintaining your backlog will be less overwhelming.
In addition, Visor offers different types of Jira visualization options for project data and is a popular Jira Gantt chart solution. Our AI-powered templates make it easy to create roadmaps and Gantts. Explore our templates, such as our agile project plan template and our IT project plan templates.
These options are useful for when you’re in the agile project planning stages of your development lifecycle. You can also find Visor in the Atlassian Marketplace.